Introduction
If you’re searching for the easiest, cutest, and most festive treat this spooky season, look no further than No-Bake Oreo Bat Cookies. These no-bake Halloween cookies are everything you want in a holiday dessert: quick to make, family-friendly, and irresistibly fun to eat. With just a handful of ingredients—Oreos, chocolate, candy eyes, and a touch of creativity—you can whip up a tray of spooky Oreo treats in under 30 minutes. These are a favorite in my guide to Halloween Cookie Recipes, perfect for when you need a festive treat without turning on the oven.
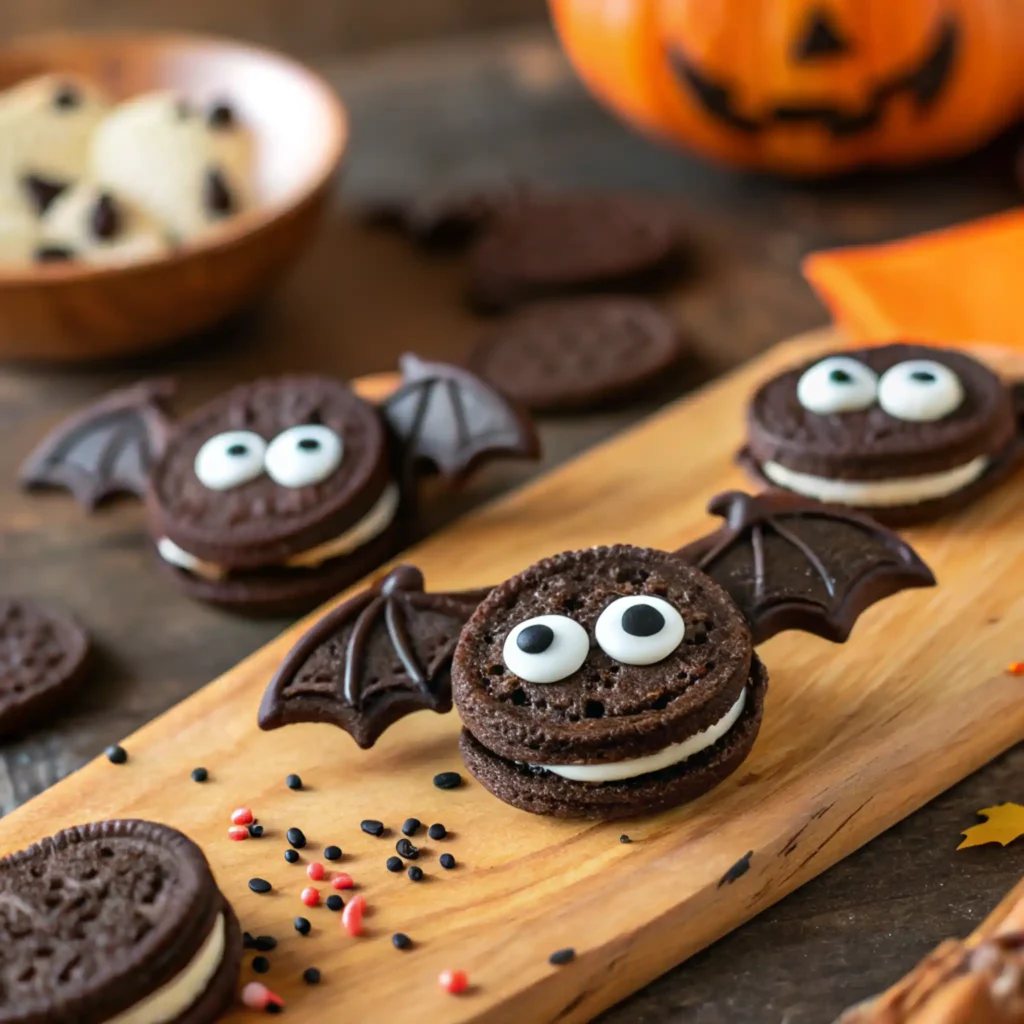
Unlike decorated sugar cookies or detailed cut-outs, these easy Oreo bat cookies require no special baking skills. Simply melt, dip, decorate, and you’ve got an entire flock of edible bats ready for your Halloween party dessert table. Kids will love helping with the assembly, making this a perfect recipe for little hands (and a great excuse to get messy in the kitchen).
Table of Contents
Why You’ll Love These No-Bake Oreo Bat Cookies
These No-Bake Oreo Bat Cookies aren’t just adorable—they’re one of the most practical and fun desserts you can make during spooky season. Here’s why they’ll become a Halloween tradition in your kitchen:
- No Oven Required – Perfect for when you’re short on time or don’t want to heat up the kitchen. These no bake Halloween cookies can be ready in under 30 minutes.
- Kid-Friendly & Fun – From twisting apart Oreos to adding candy eyes, kids will love helping out. It’s more than a recipe—it’s a craft project you can eat.
- Minimal Ingredients, Maximum Impact – With only Oreos, chocolate, candy eyes, and sprinkles if you like, you’ll create festive Halloween Oreo treats that look like they took hours.
- Perfect Party Treat – Add them to a dessert table alongside other easy snacks like Halloween Marshmallow Pops and watch them disappear. They add whimsy to your spread without requiring endless effort.
- Last-Minute Friendly – Need something for a school party, trick-or-treat night, or a Halloween potluck? These easy Oreo bat cookies come together faster than you can carve a pumpkin.
Whether you’re making them as an activity with kids or as a Halloween party dessert, these bats bring the fun and the flavor without stress.
Print
No-Bake Oreo Bat Cookies
- Total Time: 25 minutes
- Yield: 12 cookies 1x
Description
These No-Bake Oreo Bat Cookies are the ultimate last-minute Halloween treat! Made with Double Stuf Oreos, melted chocolate, and candy eyes, they’re spooky, cute, and ready in under 30 minutes. Perfect for parties, school events, or a fun activity with kids.
Ingredients
- 18 Oreo Double Stuf sandwich cookies (essential for holding wings)
- 1 cup chocolate melting wafers or chocolate chips
- 2 teaspoons vegetable oil
- 24 candy eyes
Instructions
- Carefully twist apart 6 Oreos and discard the cream filling. Break each cookie half in two to form 24 “bat wings.”
- Line a baking sheet with parchment or wax paper.
- In a microwave-safe bowl, combine chocolate melting wafers (or chips) with vegetable oil. Heat in 30-second intervals, stirring each time, until smooth.
- Dip one side of each of the remaining 12 Oreos in melted chocolate, keeping the cream center exposed. Place on the prepared baking sheet.
- While the chocolate is still wet, press 2 candy eyes onto the coated portion of each Oreo.
- Once the cookies have set slightly, insert two bat wings into the cream center of each Oreo to complete the bat shape.
- Chill for 10 minutes to set fully before serving.
Notes
- Use Double Stuf Oreos: The extra cream filling gives you room to insert wings without breaking.
- Make them colorful: Swap dark chocolate for orange, purple, or green candy melts.
- Gluten-free option: Use gluten-free Oreos for an allergy-friendly version.
- Storage: Keep in an airtight container at room temp for 2–3 days or refrigerate for up to a week.
- Freezer-friendly: Freeze for up to 1 month. Thaw overnight in the fridge before serving.
- Prep Time: 15 minutes
- Chill Time: 10 minutes
- Cook Time: 0 minutes (microwave melting only)
- Category: Dessert
- Method: No-Bake
- Cuisine: American
Nutrition
- Serving Size: 1 cookie
- Calories: 139 kcal
- Sugar: 13 g
- Sodium: 73 mg
- Fat: 7 g
- Carbohydrates: 19 g
- Fiber: 1 g
- Protein: 1 g
- Cholesterol: 3 mg
Ingredients You’ll Need for No-Bake Oreo Bat Cookies

The beauty of No-Bake Oreo Bat Cookies is how simple yet creative they are. You don’t need a long shopping list—just a few pantry staples and Halloween-themed add-ins. Here’s what makes these spooky cookies come alive:
- Oreos (Double Stuf preferred) – The classic cookie is the star of the show. The extra cream filling in Double Stuf Oreos makes it easier to wedge the “bat wings” in place without breaking. If you’re making a large batch, grab the family pack.
- Chocolate Melting Wafers or Chocolate Chips – These hold everything together and give the bats their smooth, glossy finish. If you’re after a Halloween party dessert that looks bakery-quality, melting wafers are your best choice. Chocolate chips work too—just remember to add oil for shine.
- Vegetable Oil (or Coconut Oil) – A small amount helps keep the melted chocolate silky and easy to work with, perfect for dipping and decorating.
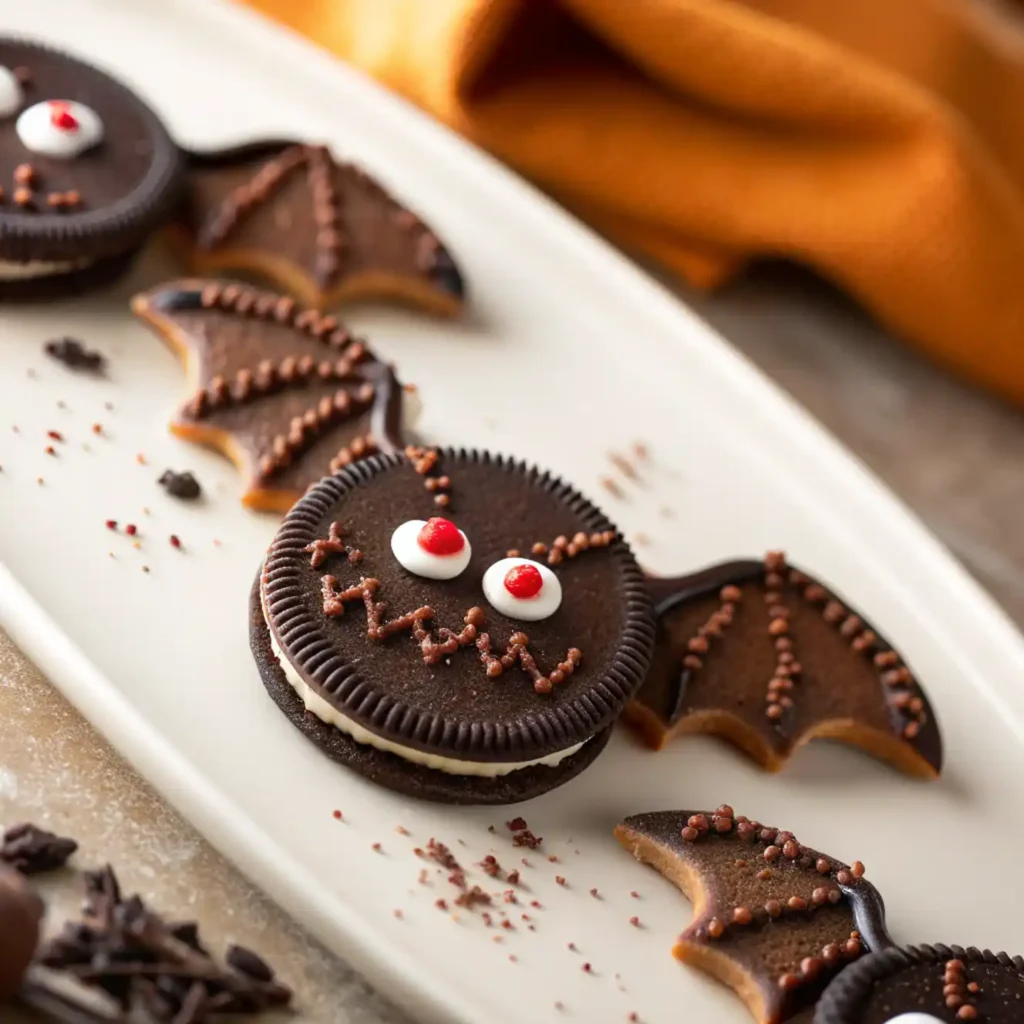
- Candy Eyes – The detail that takes these Halloween Oreo treats from cute to spooky. You can find them at most grocery stores around October, or make your own with white chocolate and mini chocolate chips.
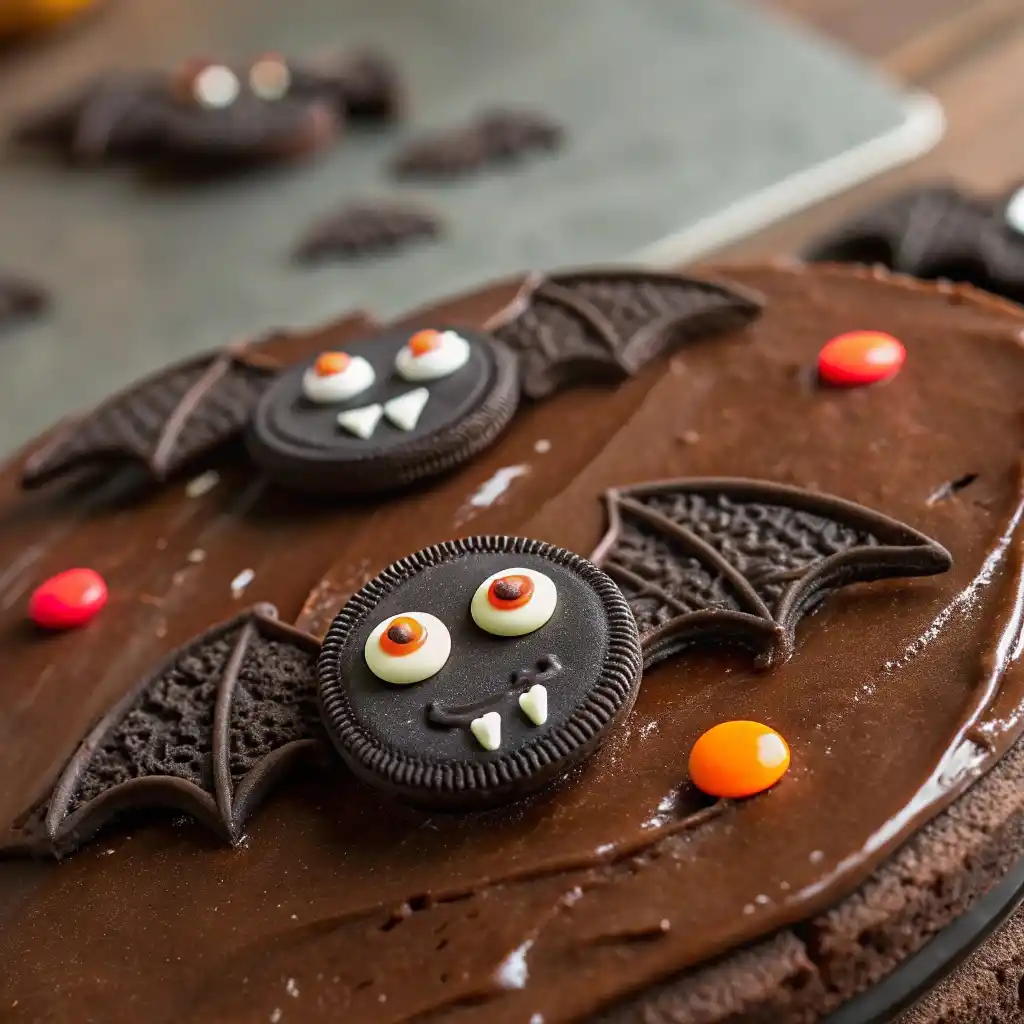
- Optional: Sprinkles or Colored Candy Melts – If you want to dress up your easy Oreo bat cookies even more, add Halloween sprinkles or swap the classic brown coating for orange or purple candy melts.
Pro Tips for Success
- Stick to Double Stuf Oreos – Regular Oreos don’t have enough filling to anchor the bat wings. This is the #1 tip to prevent frustration.
- Work Quickly with Chocolate – Melted chocolate sets fast. Keep your candy eyes and wings prepped and ready before dipping.
- Get Kids Involved – Assign them the fun part: sticking on candy eyes or pressing sprinkles into the wings. It makes the no bake Halloween cookies even more memorable.
Want to balance your dessert table with something savory? Try this Halloween Dinner Charcuterie Board for a mix of spooky snacks and treats.
How to Make No-Bake Oreo Bat Cookies (Step-by-Step)
Making No-Bake Oreo Bat Cookies is as easy as it gets. No oven, no fuss—just a little chocolate, some Oreos, and a sprinkle of Halloween fun. Follow these steps for perfect results every time:
Step 1: Prep Your Bat Wings
- Take 6 Oreo cookies and carefully twist them apart. Scrape off and discard the cream filling.
- Break each cookie in half to form 24 bat wings.
- Tip: Use a gentle rocking motion to separate the cookies without shattering them. If one breaks unevenly, set it aside—it makes a great snack while you decorate.
Step 2: Melt the Chocolate
- Place your chocolate melting wafers or chips in a microwave-safe bowl. Add the vegetable oil to help smooth things out.
- Microwave in 30-second bursts, stirring between each round, until the chocolate is glossy and lump-free.
- Don’t overheat! Burnt chocolate is difficult to work with.
Step 3: Dip the Oreos

- Take the remaining 12 whole Oreos (with filling intact). Dip one side of each cookie into the melted chocolate, coating just enough to anchor your decorations.
- Place dipped cookies on a parchment-lined baking sheet.
Step 4: Add the Eyes
- While the chocolate is still wet, gently press two candy eyes onto each Oreo.
- These little googly details transform them from plain cookies into fun Halloween Oreo bats in seconds.
Step 5: Attach the Wings
- Once the chocolate has set, gently slide two cookie “wings” into the cream filling of each Oreo. One on each side.
- If needed, dab a little extra melted chocolate where the wings meet the Oreo for extra stability.
Step 6: Let Them Set and Serve
- Chill the finished bats in the fridge for 10 minutes so the chocolate hardens.
- Arrange on a Halloween platter and watch them disappear at your party!
Pro Serving Ideas
- Display alongside Halloween Sprinkle Cookies for a colorful spread.
- Wrap individually in clear treat bags for classroom parties or trick-or-treat giveaways.
- Create a spooky dessert board featuring these bats, White Chocolate Strawberry Ghosts, and mini pumpkins for a Pinterest-worthy Halloween platter.
Tips, Tricks & Variations for No-Bake Oreo Bat Cookies
These No-Bake Oreo Bat Cookies are already simple and spooky-cute, but with a few extra tips and creative twists, you can make them even more fun and foolproof.
Pro Tips for Perfect Oreo Bats
- Stick with Double Stuf Oreos
- Regular Oreos just don’t have enough filling to hold the wings securely. Using Double Stuf ensures your easy Oreo bat cookies won’t fall apart mid-party.
- Prep Before You Dip
- Lay out your wings and candy eyes ahead of time. Once the chocolate sets, it’s harder to attach the decorations. Prepping makes assembly quick and stress-free.
- Use a Cooling Rack + Tray
- Place your parchment-lined tray on a cooling rack before chilling. It helps the chocolate harden evenly and prevents soggy bottoms.
- Keep Hands Clean
- Chocolate-covered fingers can smudge the cookies. Use tweezers or toothpicks to place the eyes if you want a neat finish.
Creative Variations for Oreo Bat Cookies
- Colorful Candy Melts
Swap classic brown chocolate for purple or orange melts. This gives your Halloween Oreo treats a brighter, more festive look. - Sprinkle-Coated Bats
After dipping the cookies in chocolate, press Halloween sprinkles into the coating before it sets. Great for kids’ parties where extra color = extra fun. - Gluten-Free Oreo Bats
Use gluten-free Oreos for guests with dietary restrictions. The taste is nearly identical, and everyone gets to enjoy these Halloween party desserts. - Mini Oreo Bats
Make bite-sized bats with Mini Oreos! They’re perfect for party platters and school lunches. Just adjust the wings to smaller halves.
How to Store Your Oreo Bat Cookies
- Room Temperature: Store in an airtight container for up to 3 days.
- Fridge: Keeps fresh for up to a week—just bring them to room temp before serving so the chocolate isn’t too hard.
- Freezer: You can freeze them for up to 1 month. Thaw in the fridge overnight before serving.
Pair these bats with other no-bake treats like Halloween Thumbprint Cookies for a stress-free Halloween dessert spread.
FAQs About No-Bake Oreo Bat Cookies
Can I make No-Bake Oreo Bat Cookies ahead of time?
Yes! These No-Bake Oreo Bat Cookies can be made up to 2–3 days in advance. Store them in an airtight container at room temperature or in the fridge. Just make sure to let them come back to room temperature before serving so the chocolate isn’t too hard.
What’s the best type of Oreo to use?
Always choose Double Stuf Oreos when making these easy Oreo bat cookies. The thicker cream filling gives you enough space to insert the cookie wings without breaking the cookie. Mini Oreos also work if you want smaller bats, but they’re a little trickier to assemble.
How do I keep the wings from falling off?
The trick is to press the cookie halves (the “bat wings”) gently into the cream filling while the chocolate is still a little soft. If you’re worried about them slipping, dip the edge of the wings in a little melted chocolate before pressing them in—that acts like edible glue!
Can I customize these Halloween Oreo treats?
Absolutely! You can coat the Oreos in colored candy melts (orange, purple, green), add Halloween sprinkles, or even use different flavored Oreos like Golden Oreos or Peanut Butter Oreos for a fun twist. They’re one of the most versatile Halloween party desserts.
Do No-Bake Oreo Bat Cookies freeze well?
Yes, they freeze beautifully. Place them in a single layer on a tray until firm, then store them in an airtight freezer-safe container for up to 1 month. To serve, thaw in the fridge overnight. They’ll taste just as spooky and delicious as fresh!
Conclusion
When it comes to Halloween baking, sometimes the simplest ideas are the most magical. These No-Bake Oreo Bat Cookies prove you don’t need fancy tools, hours in the kitchen, or advanced decorating skills to create a show-stopping dessert. With just a few pantry staples—Oreos, chocolate, and candy eyes—you can whip up a spooky-cute treat that kids, adults, and party guests will all love.
The best part? These easy Oreo bat cookies are perfect for any Halloween celebration. Add them to your dessert table alongside other no-bake Halloween recipes, tuck them into lunchboxes for a sweet seasonal surprise, or serve them at a Halloween movie night. However you choose to enjoy them, these Halloween Oreo treats will quickly become a go-to recipe you’ll want to make year after year.
So grab a pack of Double Stuf Oreos, let your creativity take flight, and get ready to wow your family and friends with these festive little bats. After all, Halloween is all about fun—and what could be more fun than cookies that fly right off the plate?