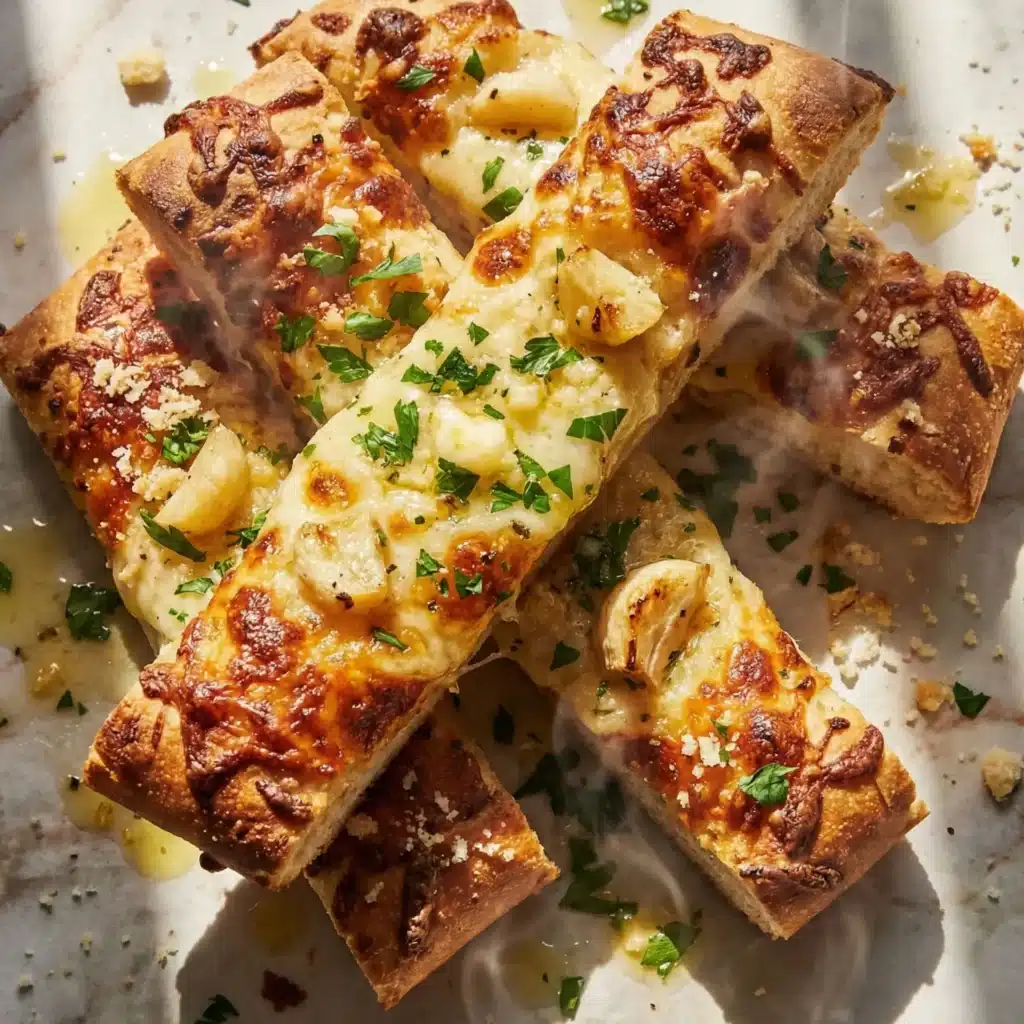
Can you believe you can whip up restaurant-style Garlic Cheesy Breadsticks in less time than it takes to order Domino’s? It sounds like a “too good to be true” internet hack, but by using my viral high-protein dough base, we transform a guilty pleasure into a macro-friendly side dish that packs 10g of protein per stick.
These are a staple in my rotation of 30+ High Protein Lunch Ideas because they pair perfectly with a fresh salad or soup for a balanced midday meal. Soft, garlicky, and loaded with melted mozzarella—this is the “fakeaway” recipe you need in your life immediately.
Usually, Homemade cheesy bread involves activating yeast, waiting hours for the dough to proof, and consuming a lot of empty carbs soaked in vegetable oil. These Cottage cheese breadsticks flip the script entirely. We use blended cottage cheese to add essential moisture and protein without sacrificing that satisfying, pull-apart texture you crave. This recipe has quickly become a crowd-favorite in my High Protein Cottage Cheese Recipes collection because it feels indulgent but fuels your body. It uses the exact same base as my High Protein Bagels, just shaped differently to maximize the cheese-to-dough ratio!
Table of Contents
Why This Healthy Breadsticks Recipe Works
If you have ever tried to make “healthy” bread, you likely know the struggle. Almond flour can be gritty and dense; cauliflower crusts are often soggy and lack structure. This Healthy breadsticks recipe bypasses those common pitfalls by leveraging the unique science of dairy protein. Unlike traditional recipes that rely on gluten development from hours of kneading and yeast fermentation, this 2 ingredient dough breadsticks recipe relies on the protein structure of cottage cheese and chemical leavening.
The Science Behind the Dough: Why It Rises
The magic of this recipe lies in the chemical interaction between the ingredients. When you blend cottage cheese, you aren’t just making it smooth; you are creating a protein-rich emulsion.
- The Acid-Base Reaction: Cottage cheese is naturally acidic (containing lactic acid). Self-rising flour contains baking powder (which is baking soda + an acid salt). When the acidic cheese hits the baking powder, it creates an immediate lift, fluffing up the dough without the need for yeast.
- Protein Structure: The casein protein in cottage cheese mimics the structure of gluten to an extent. It provides the “chew” and elasticity that gluten-free or veggie-based doughs often lack.
- Hydration: The moisture in the cheese curds evaporates slowly during baking. This steam gets trapped inside the dough structure, creating a soft, pillowy interior while the high heat of the oven crisps the outside.
High Protein Garlic Bread vs. Traditional Breadsticks
Let’s look at the numbers. Why should you swap your usual takeout order for this High protein garlic bread? A standard breadstick from a chain restaurant is essentially a sponge for refined oil and simple sugars.
| Feature | My Garlic Cheesy Breadsticks | Traditional Takeout Breadsticks |
|---|---|---|
| Main Ingredient | Cottage Cheese & Self-Rising Flour | Bleached Flour, Soybean Oil, Sugar |
| Protein Per Stick | 10g | 3g |
| Calories | 140 | 180+ |
| Fat Source | Real Butter & Cheese | Vegetable Oil / Margarine |
| Prep Time | 10 Minutes | 2+ Hours (Proofing time) |
| Texture | Soft, Chewy, Substantial | Airy, greasy, often empty |
| Fullness Factor | High Satiety (Casein Protein) | Low Satiety (Blood Sugar Spike) |

Title: Garlic Cheesy Breadsticks (High Protein)
- Total Time: 25 mins
- Yield: 8 Breadsticks 1x
Description
These Garlic Cheesy Breadsticks are soft, buttery, and packed with protein. Made with 2-ingredient cottage cheese dough, they are a healthy “fakeaway” side dish ready in under 25 minutes.
Ingredients
- 1 cup Cottage Cheese (4% milkfat recommended, full fat is best)
- 1 cup Self-Rising Flour (plus extra for dusting)
- 1/2 cup Shredded Mozzarella Cheese (Low Moisture part-skim)
- 2 tbsp Butter (Unsalted, melted)
- 2 cloves Fresh Garlic (minced finely)
- 1 tbsp Dried Parsley
- 1 tbsp Parmesan Cheese (Grated)
- 1/4 tsp Salt (optional)
Instructions
- Preheat: Preheat your oven to 400°F (200°C). Line a large baking sheet with parchment paper.
- Blend: Add the cottage cheese to a high-speed blender or food processor. Blend on high for 30-60 seconds until completely smooth and creamy.
- Mix: Transfer the smooth cheese to a medium bowl. Add the self-rising flour. Stir with a spatula until combined.
- Knead: Use your hands to knead the dough in the bowl for about 1 minute until a smooth ball forms. If sticky, add a pinch more flour.
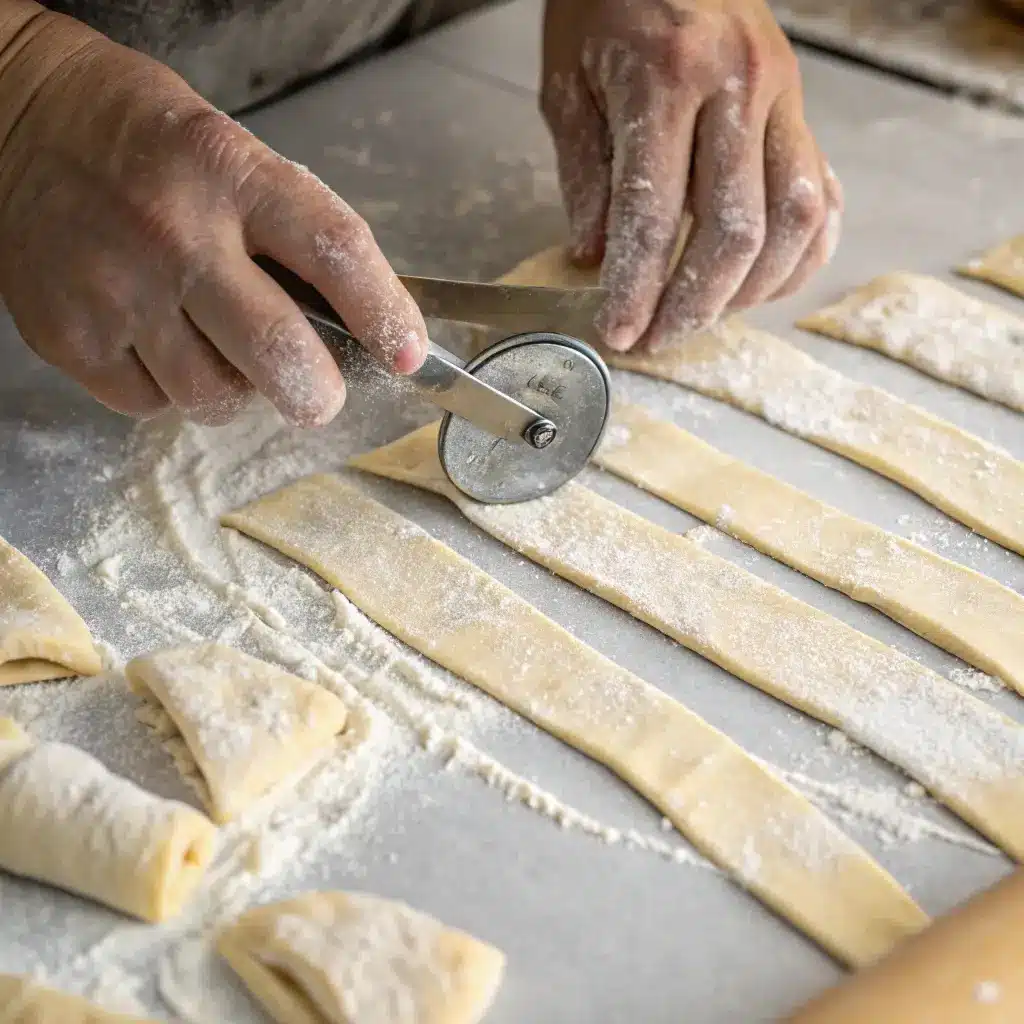
- Roll: Turn dough onto a floured surface (or directly on parchment). Roll into a rectangle, roughly 1/2 inch thick.
- Cut: Use a pizza cutter to slice the rectangle into 8 even strips. Separate them slightly on the baking sheet.
- Bake: Bake for 12-15 minutes until the breadsticks are puffed up and golden brown.
- Topping: While baking, whisk the melted butter, minced garlic, and parsley in a small bowl.
- Serve: Remove from oven. Immediately brush hot breadsticks with the garlic butter mixture and sprinkle with Parmesan. Serve warm.
Notes
- Storage: Store leftovers in the fridge for up to 3 days.
- Reheating: Reheat in the air fryer at 350°F for 2-3 minutes to restore crispiness. Microwave will make them soft.
- No Self-Rising Flour? Mix 1 cup All-Purpose Flour + 1.5 tsp Baking Powder + 1/4 tsp Salt.
- Prep Time: 10 mins
- Cook Time: 15 mins
- Category: Side Dish
- Method: Oven
- Cuisine: American / Italian
Nutrition
- Serving Size: 1 Breadstick
- Calories: 140 kcal
- Sugar: 1 g
- Sodium: 380 mg
- Fat: 4 g
- Saturated Fat: 2.5 g
- Carbohydrates: 18 g
- Fiber: 0.5 g
- Protein: 10 g
- Cholesterol: 15 mg
Ingredients for Cheesy Breadsticks: A Deep Dive
To make these Homemade Cheesy Bread sticks, you don’t need yeast, sugar, or waiting time. However, because the list is so short, the quality of your ingredients matters significantly.
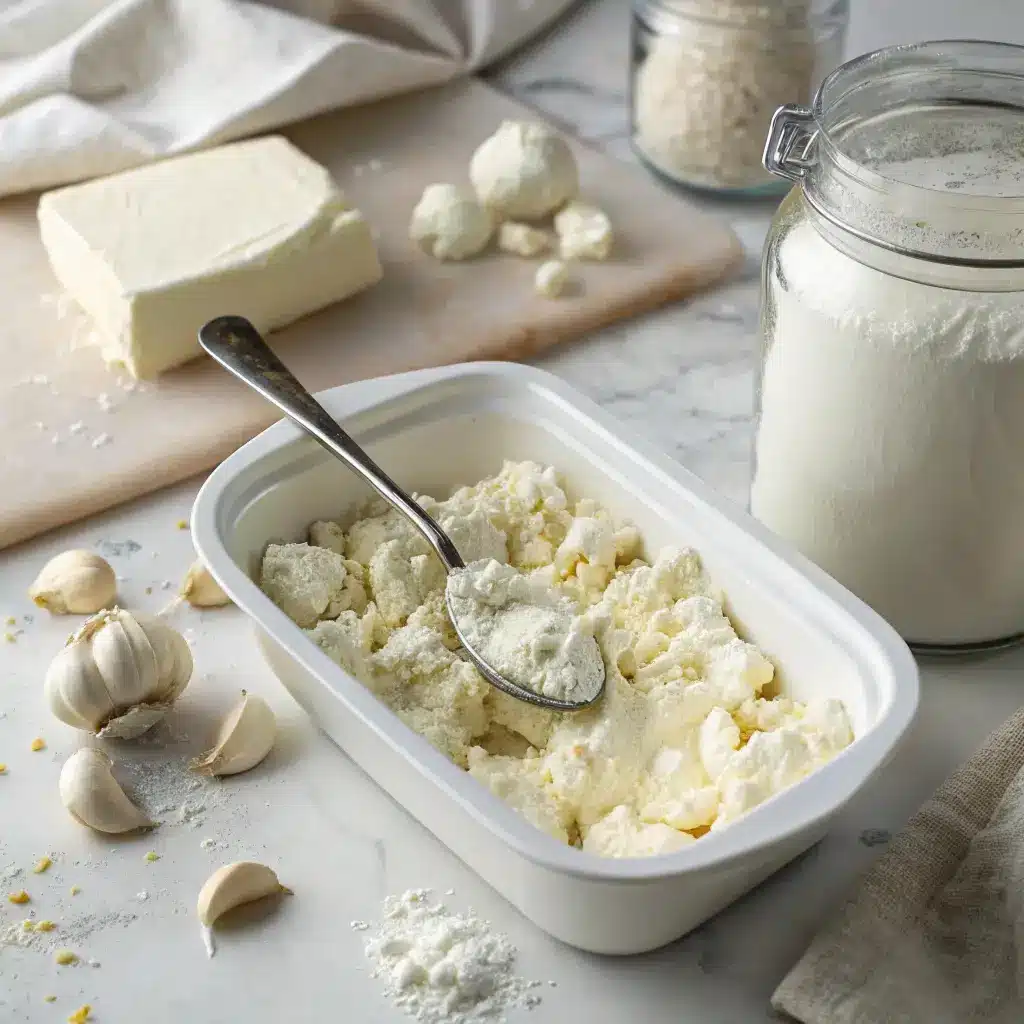
1. The Dough Base
- Self-Rising Flour: This is non-negotiable for the rise. It contains the perfect ratio of baking powder and salt pre-mixed.
- Science Note: If you use All-Purpose flour, your breadsticks will be flat, dense pucks. Self-rising flour is specially formulated to ensure a consistent rise without yeast.
- Blended Cottage Cheese: This is the secret weapon.
- Fat Content: Use 4% Milkfat (Full Fat) for the best texture. Fat equals flavor and tenderness. Low-fat or fat-free varieties have higher water content and less stabilizer, which will make the dough incredibly sticky and difficult to handle.
- Brand Recommendations: I prefer brands like Good Culture or Daisy. They tend to be thicker and have fewer “gums” than cheaper generic brands. If your cottage cheese is very watery, you may need to strain it slightly or add more flour.
2. The Cheesy Filling
- Shredded Mozzarella: I strongly recommend Low-Moisture Part-Skim Mozzarella.
- Why? Fresh mozzarella (the white balls stored in water) is too wet. It will release liquid during baking and make your breadsticks soggy. Low-moisture mozzarella gives you that iconic, stringy cheese pull without the mess.
- Pro Tip: Buy a block and shred it yourself. Pre-shredded bagged cheese is coated in cellulose (wood pulp) and potato starch to prevent clumping. These anti-caking agents prevent the cheese from melting into a cohesive, gooey layer.
3. The Garlic Butter Topping
- Melted Butter: Salted butter gives the best flavor punch. If using unsalted, add a pinch of salt to the mix.
- Fresh Garlic: Please, for the love of flavor, do not use powder here! Minced fresh garlic caramelizes in the oven and provides that authentic pizzeria taste. Garlic powder will just sit on top and taste dusty.
- Dried Parsley: For that classic speckled bakery look. You can use fresh parsley, but dried tends to hold up better to the heat of the garlic butter without wilting.
4. The Finish
- Grated Parmesan Cheese: Adding this at the very end adds a salty, umami kick that cuts through the richness of the butter. The combination of Mozzarella (for stretch) and Parmesan (for flavor) is the gold standard for Italian sides.
Looking for a main dish to pair this with? If you love garlic, you’ll love my Garlic Parmesan Crockpot Chicken and Potatoes too.
Equipment Essentials
You don’t need a fancy stand mixer for this recipe, but a few tools will make your life easier:
- High-Speed Blender or Food Processor: To get the cottage cheese perfectly smooth. A mini-chopper works well too.
- Parchment Paper: This dough will stick to aluminum foil or a bare pan. Parchment paper is essential.
- Pizza Cutter: Much easier than a knife for cutting clean, straight strips of dough.
- Pastry Brush: For evenly distributing that glorious garlic butter.
How to Make High Protein Breadsticks (Step-by-Step)
Ready to bake? Follow these steps to ensure your Cottage Cheese Breadsticks come out fluffy and golden, not dense or rubbery.
Step 1: The Blend (The Most Critical Step)
First, we need to create our base. Add your cottage cheese to a high-speed blender or food processor. Blend it until it is completely liquid smooth—no curds allowed!
- Sensory Cue: It should look like thick pancake batter or heavy glue. If you see lumps, keep blending.
- Troubleshooting: If your blender gets stuck, you can add a tiny splash (1 tsp) of milk, but try to avoid adding liquid if possible. Scrape down the sides often.
- Pour the smooth cheese into a bowl and mix in the self-rising flour. Knead it with your hands until a soft ball forms. (See my Cottage Cheese Flatbread post for more detailed blending tips if you are struggling with texture!).
Step 2: The Knead and Shape
Turn your 2 ingredient dough breadsticks mixture out onto a piece of parchment paper heavily dusted with flour.
- The Texture Check: The dough should be “tacky” (like a Post-It note) but not “sticky” (like gum). If it sticks to your fingers, dust it with more flour.
- Roll: Use a rolling pin to shape the dough into a rough rectangle, about 1/2 inch thick. Do not roll it too thin, or you will end up with crackers instead of fluffy breadsticks.
- Slice: Use a pizza cutter or a sharp knife to slice the rectangle into 8 long strips. You can leave them connected slightly for a “pull-apart” style, or separate them by an inch for crispier edges on all sides.
Step 3: The Bake
Slide the parchment paper onto a baking sheet. Bake at 400°F (200°C) for 12-15 minutes.
- Why 400°F? The high heat is necessary to activate the baking powder quickly, giving the breadsticks their “puff” before the crust sets.
- Visual Cue: Look for the breadsticks to puff up significantly and turn a light golden brown. If they are still pale, give them another 2 minutes. The cheese inside (if you stuffed them) or the dough itself needs to set fully.
Step 4: The Brush and Garnish
While the Garlic Cheesy Breadsticks are baking, mix your melted butter, minced garlic, and parsley in a small bowl.
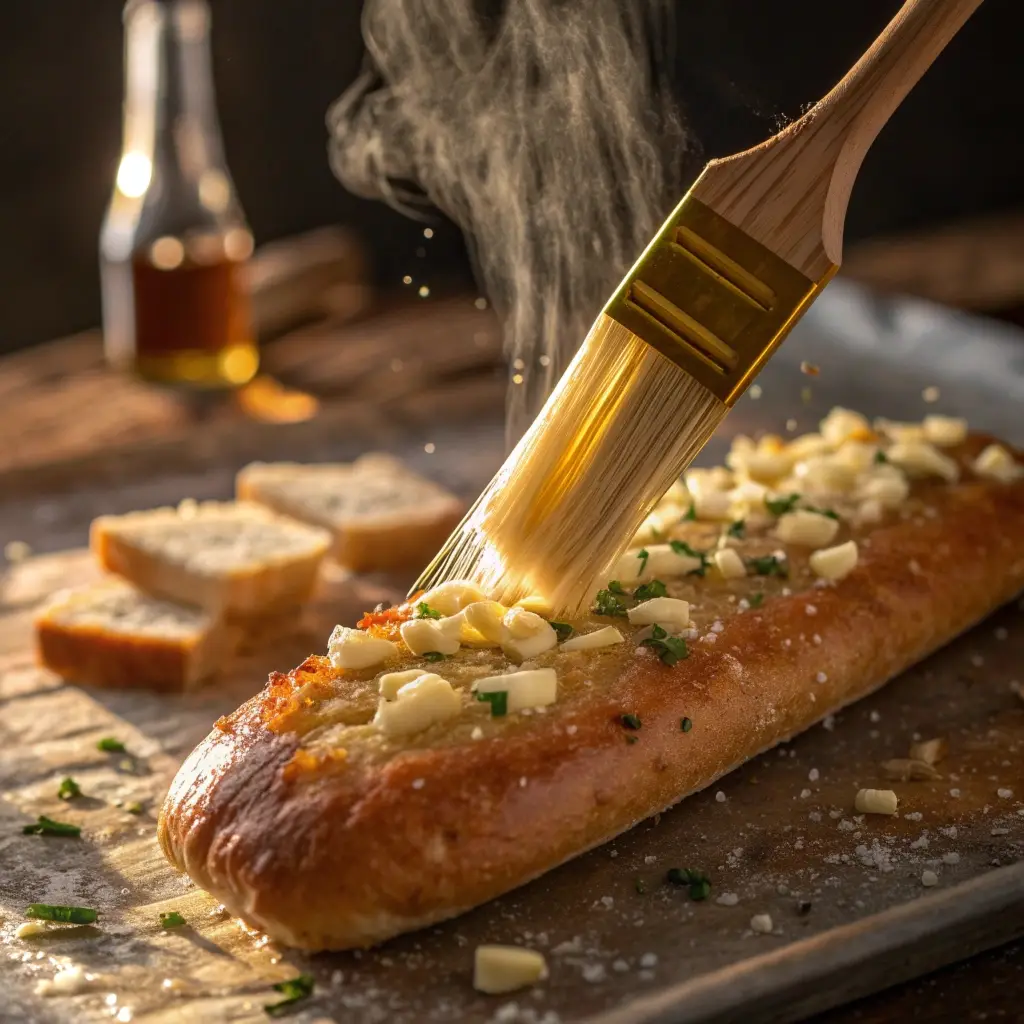
- The Sizzle: As soon as you pull the hot breadsticks out of the oven, brush them generously with the garlic butter mixture. The heat from the bread will cook the raw garlic slightly, taking the bite out of it.
- The Snowfall: Top immediately with the grated Parmesan so it melts into the warm butter. Let them cool for 2-3 minutes before serving—this allows the structure to set so they don’t collapse when you pick them up.
Variations & Serving Ideas
These Garlic Cheesy Breadsticks are a blank canvas. Here is how to adapt them for different cravings.
The Spicy Stick
If you like heat, add 1/2 teaspoon of red pepper flakes (Calabrian chili flakes are amazing here) to your butter mixture. This adds a kick that pairs perfectly with creamy dips.
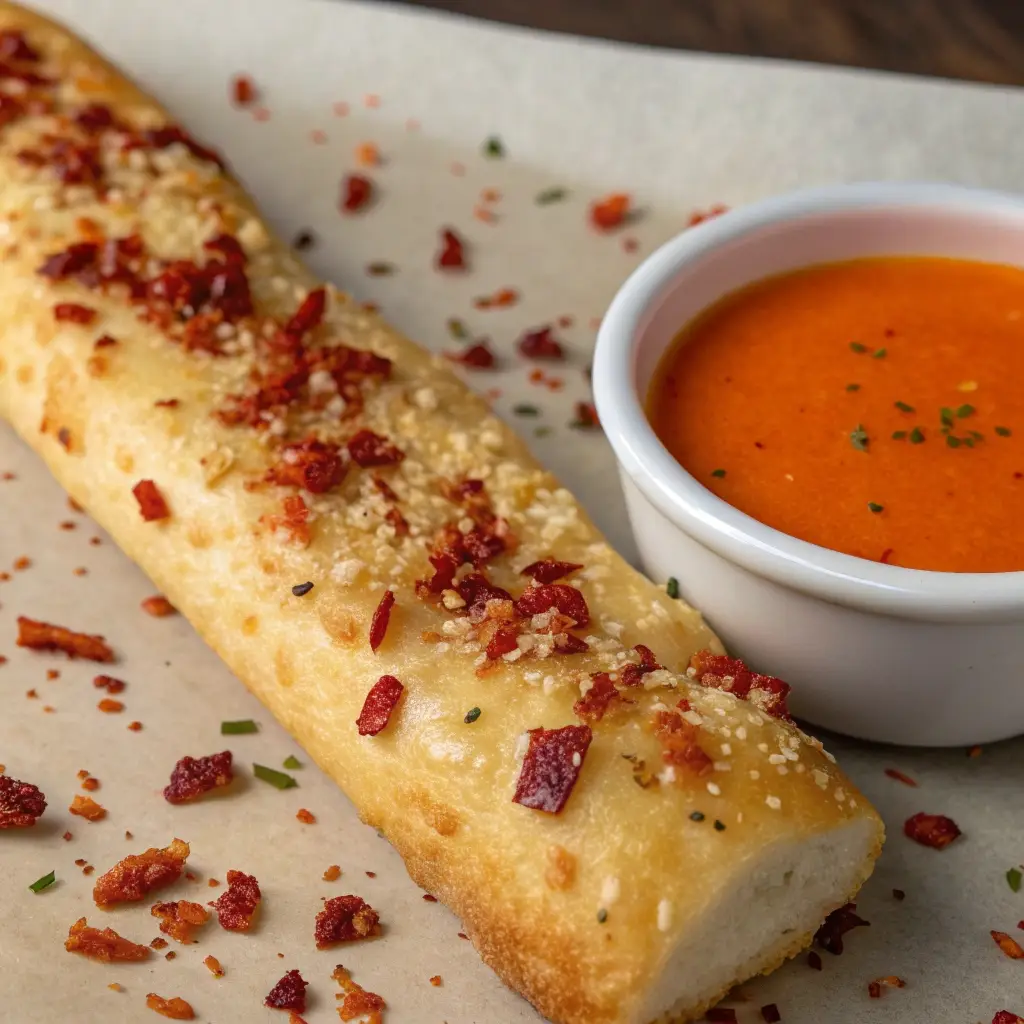
- Pairing: Serve these alongside my Slow Cooker Buffalo Chicken Pasta to sop up the extra spicy sauce.
The Ranch Dipper
Instead of marinara, serve these with a side of high-protein Greek Yogurt Ranch. The cool, tangy dip contrasts beautifully with the warm, salty bread.
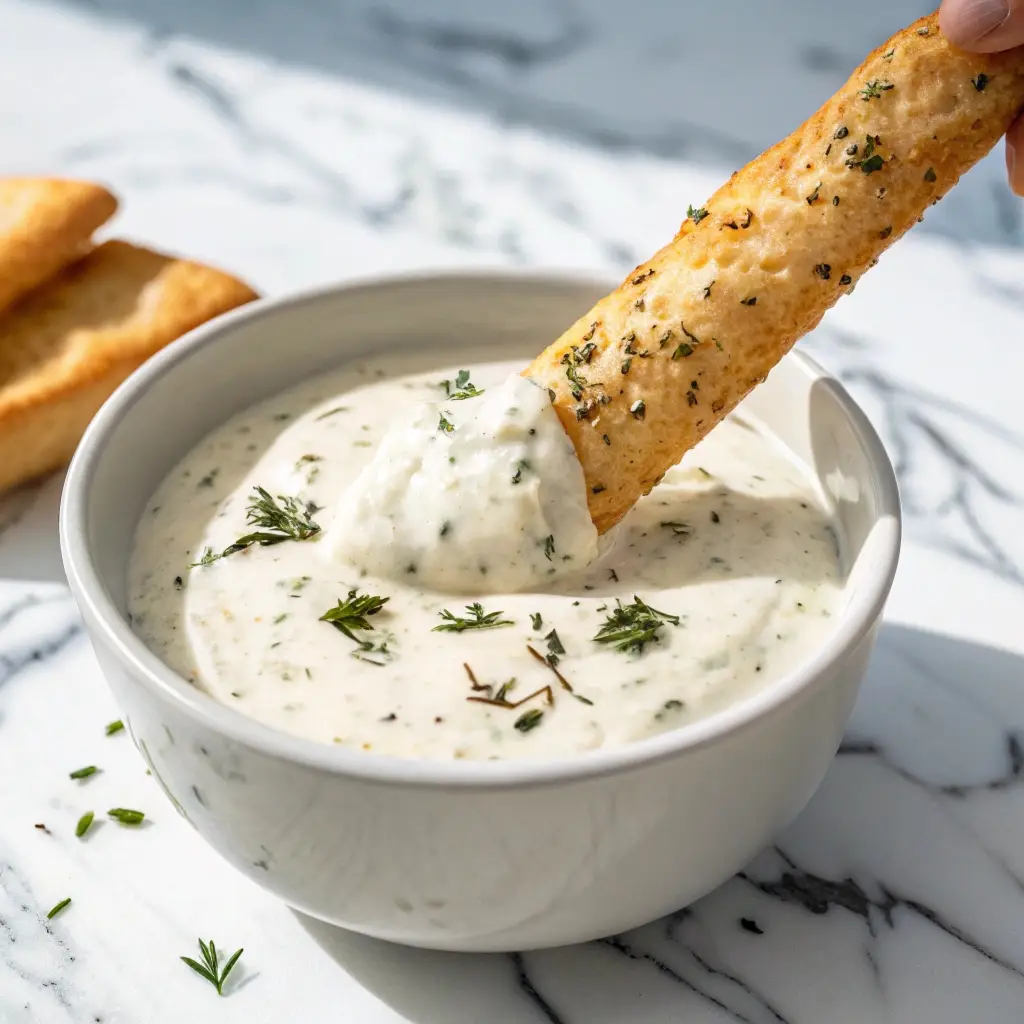
- Pairing: These are perfect for dipping into the sauce from my Creamy Ranch Chicken Crockpot.
The Stuffed Cheesy Bread
Want cheese inside? Roll your dough out thinner, sprinkle mozzarella on one half, fold the other half over, seal the edges, and then cut into strips. This creates a stuffed crust effect.
- Pairing: This heavier version works great as a main lunch item served with a simple green salad.
The Bolognese Side
This is the classic Italian dinner combo. The breadsticks act as the perfect vessel to scoop up hearty meat sauces.
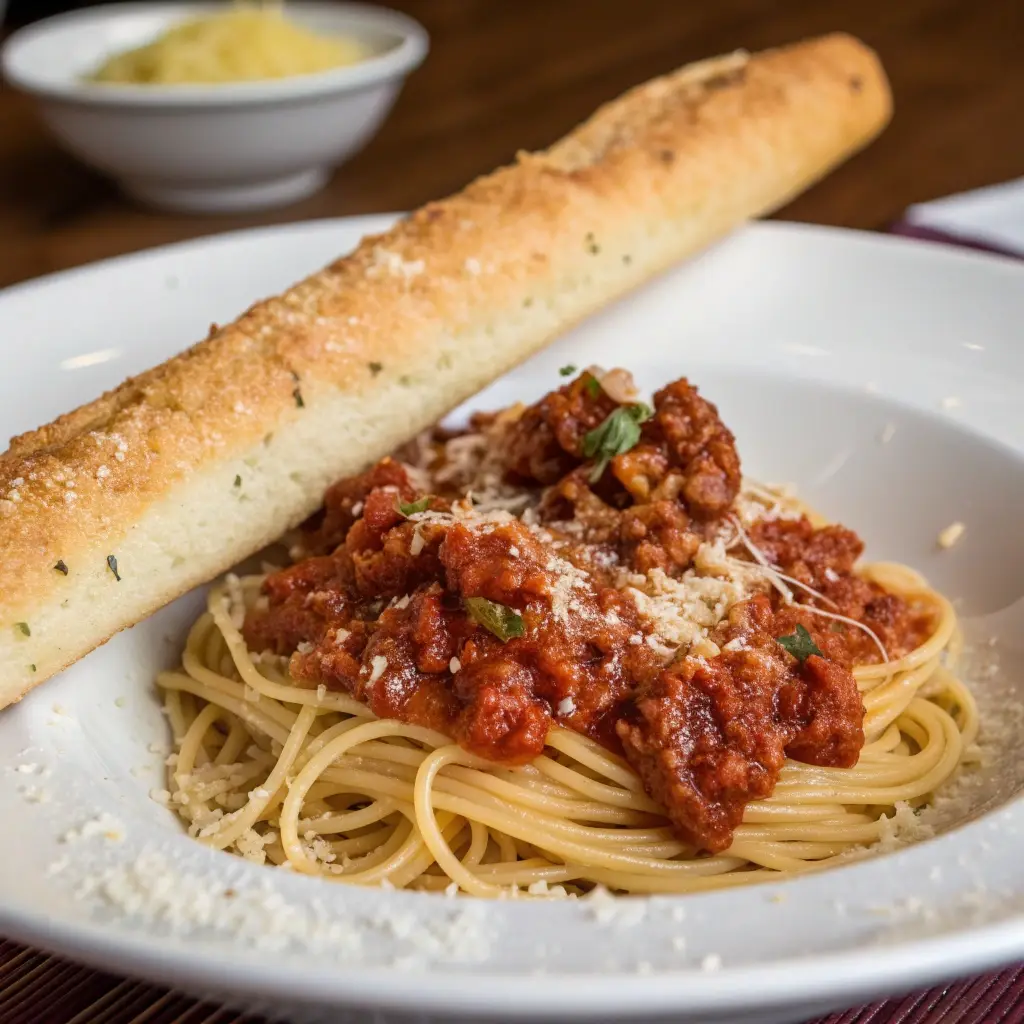
- Pairing: Serve these next to my High Protein Turkey Bolognese for a complete high-protein meal.
Troubleshooting Your Garlic Cheesy Breadsticks
Even with a simple Healthy breadsticks recipe, things can sometimes go sideways. Here are common issues and specific fixes.
Problem: The dough is impossibly sticky.
- Reason: Your cottage cheese brand likely had a higher water content.
- Solution: Do not be afraid to add more flour! Dust your hands, your rolling pin, and the surface generously. You can knead in an extra tablespoon of flour at a time until it is manageable. Using oil on your hands can also help prevent sticking.
Problem: They turned out dense and flat.
- Reason: This usually means your baking powder is old (if using homemade self-rising flour) or you over-worked the dough.
- Solution: Check your expiration dates. Also, knead just until combined. The more you play with the dough, the more dense it becomes. Also, ensure your oven is fully pre-heated to 400°F. The initial blast of heat is what activates the lift.
Problem: The garlic tastes bitter/raw.
- Reason: The garlic didn’t cook enough from the residual heat.
- Solution: Microwave your butter and garlic mixture for 30 seconds before brushing it on. This “blooms” the garlic and softens the flavor. Alternatively, brush the breadsticks 2 minutes before they are done baking to roast the garlic slightly in the oven.
Problem: The cheese on top burned.
- Reason: Your oven rack might be too high.
- Solution: Bake on the middle rack. If you are adding cheese before baking, cover the tray loosely with foil for the first 8 minutes, then uncover to brown.
How to Store and Reheat Homemade Cheesy Bread
Since these Cottage cheese breadsticks have a higher moisture content than regular bread (due to the cheese dough), proper storage is key to preventing them from getting soggy or molding.
Storage Guidelines
- Room Temperature: You can keep them in an airtight container for up to 24 hours. After that, the moisture in the dough might cause them to spoil.
- Fridge: I recommend storing them in the fridge if keeping them longer than a day. They will last up to 4-5 days. The texture will firm up, but they reheat well.
- Freezer: These freeze beautifully! Arrange the cooked, cooled breadsticks on a baking sheet and freeze for 1 hour (flash freezing). Then transfer to a freezer bag. They keep for 3 months. For specific safety advice, refer to the USDA Food Safety guidelines on freezing dairy-based products.
Reheating Instructions
- Air Fryer (Best Method): Reheat at 350°F for 3-4 minutes. This restores the crispy exterior of your Garlic Cheesy Breadsticks and re-melts the cheese perfectly.
- Oven: Bake at 350°F for 5-7 minutes until warm.
- Microwave: Only use this if you want soft, pillowy breadsticks and don’t care about the crust. 30 seconds usually does the trick, but they will be chewy.
Frequently Asked Questions
Is pizza dough the same as breadstick dough?
In this recipe, YES! We use the exact same 2 ingredient dough breadsticks base that we use for our pizza crusts and bagels. The chemistry works exactly the same way. The only difference is how we shape it (strips vs. rounds) and the toppings we apply. This makes meal prepping incredibly easy—you can make a double batch of dough and use half for pizza and half for Garlic Cheesy Breadsticks.
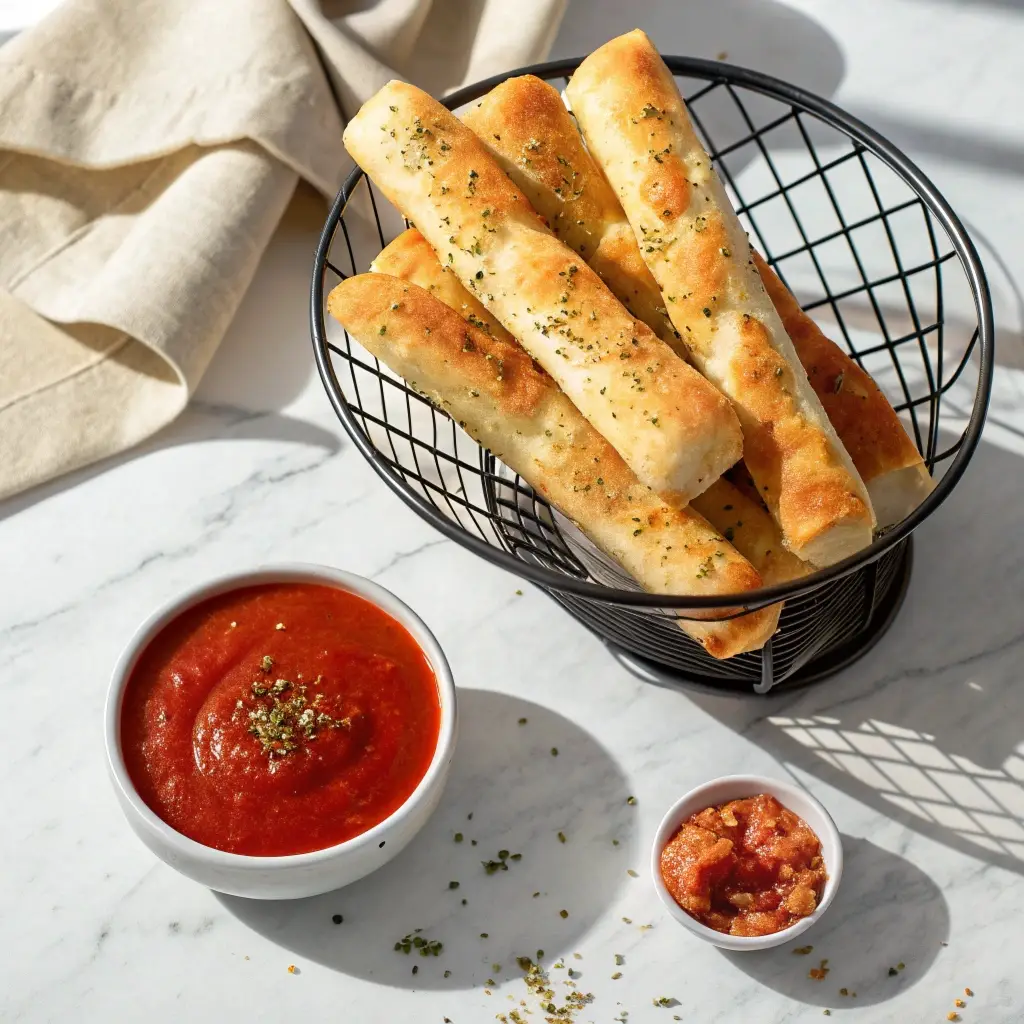
What dipping sauce goes with cheesy breadsticks?
Marinara is the classic choice. However, for a high-protein boost, I recommend dipping them in a homemade High Protein Alfredo Sauce (using blended cottage cheese and parmesan) or even a Greek yogurt-based Ranch. If you want to keep it simple, warm up some store-bought marinara—just check the label for added sugars.
What cheese is best for garlic bread?
For the stretchy factor inside or on top, Low-Moisture Mozzarella is king. It melts beautifully without releasing too much water. For the flavor finish, Parmesan or Asiago adds that salty, savory punch that cuts through the rich butter. Avoid pre-shredded cheeses if possible, as they contain anti-caking agents (cellulose) that prevent them from melting smoothly.
What are common garlic bread mistakes?
1- Using garlic powder instead of fresh: You lose that punchy restaurant flavor and the texture of the minced bits.
2- Over-baking: These breadsticks should be soft and pillowy, not crunchy like crackers. Pull them out when they are just golden.
3- Under-blending the cheese: If you leave curds, you will get weird white spots in your Homemade cheesy bread that ruin the bakery aesthetic.
What herb goes on cheesy garlic bread?
Dried Parsley is the standard for that speckled bakery look because it holds its color well. However, if you want a more pizza-like flavor, a pinch of Dried Oregano or Basil in the butter works perfectly. Fresh herbs are delicious too, but add them after baking so they don’t burn.
How to make garlic cheese bread at home without an oven?
You can use an Air Fryer! Place the dough strips in the basket (don’t overcrowd them). Cook at 375°F for 8-10 minutes, flipping halfway through. They come out even crispier on the outside than the oven version, making for incredibly fast High protein garlic bread.
Conclusion
This is the ultimate side dish that feels like a cheat meal but fits your macros perfectly. Whether you are serving them on game day or just need a comforting snack, these Garlic Cheesy Breadsticks prove that high-protein eating doesn’t have to be boring. The combination of fluffy dough, salty garlic butter, and gooey cheese is unmatched.
Need something sweet to finish the meal? My High Protein Edible Cookie Dough is the perfect treat after a savory meal.