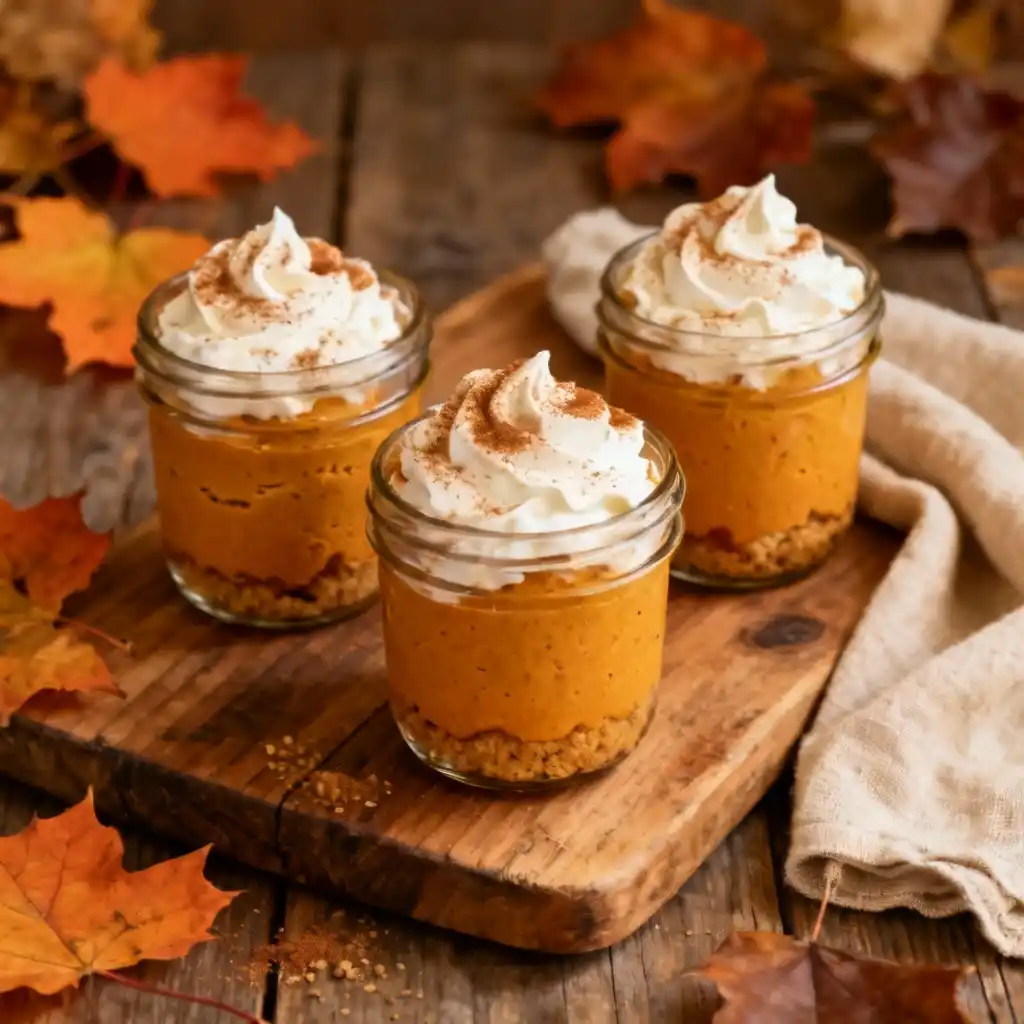
No-bake pumpkin cheesecake cups are the ultimate autumn treat for busy days and big gatherings. Each cup layers a buttery graham cracker crust beneath a velvety pumpkin-spiced cheesecake filling, all crowned with soft whipped cream and a dusting of cinnamon. The result is a spoon-worthy dessert that’s creamy, cozy, and beautifully simple — no oven required.
When the season calls for comfort, these jars answer with ease. They’re the kind of dessert that tastes indulgent yet takes minimal effort: a few minutes of mixing, a few hours of chilling, and you have a display that looks straight from a bakery window. The flavor is pure fall — sweet pumpkin, warm spice, and a gentle tang of cream cheese that balances every bite.
Because these no-bake pumpkin cheesecake cups are completely make-ahead, they’ve become one of my favorite make ahead Thanksgiving desserts. You can prepare them up to two days in advance, chill, and pull them out just before serving. The texture stays luxurious and the presentation stays flawless.
They also fit perfectly into a spread of fall dessert cups — from chocolate mousse jars to mini trifles. Each portion feels personal and elegant, and the single-serve style makes entertaining effortless. Whether you’re hosting Thanksgiving or bringing dessert to a friend’s home, these pumpkin cheesecake jars travel well, stack neatly, and draw compliments every single time.
For anyone who loves creamy pumpkin desserts but doesn’t want to fuss with crusts or baking, this recipe is the ideal balance of comfort and convenience.
💡 Planning a festive dessert board? Pair these with my Sweet Potato Bars with Cinnamon Whipped Cream for a cozy blend of creamy and spiced flavors.
Table of Contents
No-Bake Pumpkin Cheesecake Cups
- Total Time: 3 hours 15 minutes
- Yield: 6 servings (6 jars) 1x
- Diet: Vegetarian
Description
These No-Bake Pumpkin Cheesecake Cups are a creamy, spiced fall dessert layered with buttery graham cracker crust and light pumpkin cheesecake filling. Perfect as make ahead Thanksgiving desserts or cozy fall dessert cups, they’re elegant, easy, and completely oven-free. Each spoonful delivers the essence of autumn — sweet pumpkin, warm spices, and velvety cream — beautifully presented in individual jars.
Ingredients
For the Graham Crust:
- 1 cup graham cracker crumbs
- 2 tablespoons light brown sugar
- 4 tablespoons unsalted butter, melted
For the Pumpkin Cheesecake Filling:
- 8 ounces cream cheese, softened
- 1 cup pumpkin purée
- ½ cup powdered sugar
- 1 teaspoon vanilla extract
- 1 teaspoon pumpkin pie spice
- ½ teaspoon ground cinnamon
- 1 cup cold heavy whipping cream
For the Topping:
- Whipped cream (homemade or store-bought)
- Ground cinnamon or nutmeg, for garnish
- Optional: caramel drizzle, crushed graham crackers, or chopped pecans
Instructions
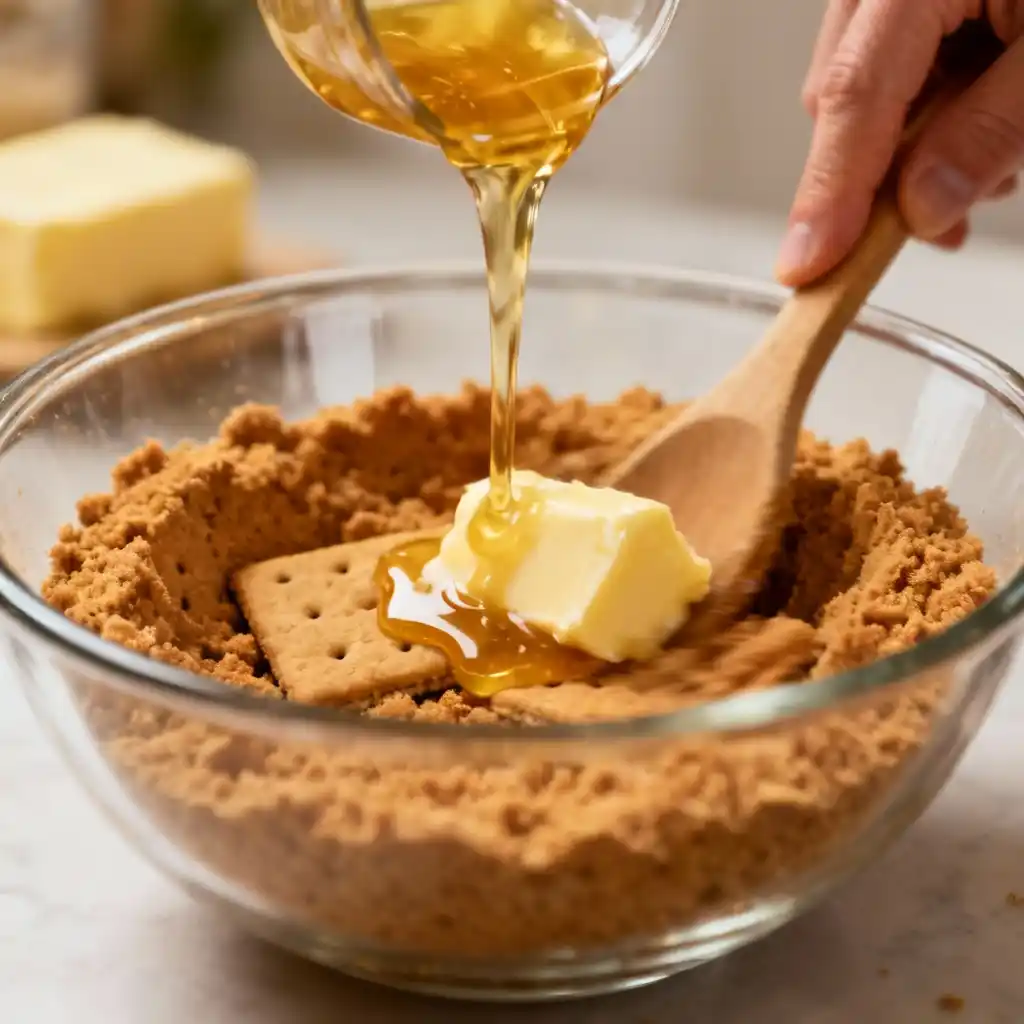
- Prepare the Crust: In a mixing bowl, stir together the graham cracker crumbs and brown sugar. Pour in melted butter and mix until the crumbs are evenly moistened and resemble damp sand.
- Form the Base: Spoon about two tablespoons of crust mixture into each small jar or glass (6-ounce size works best). Press gently with the back of a spoon to form a compact layer. Refrigerate while preparing the filling.
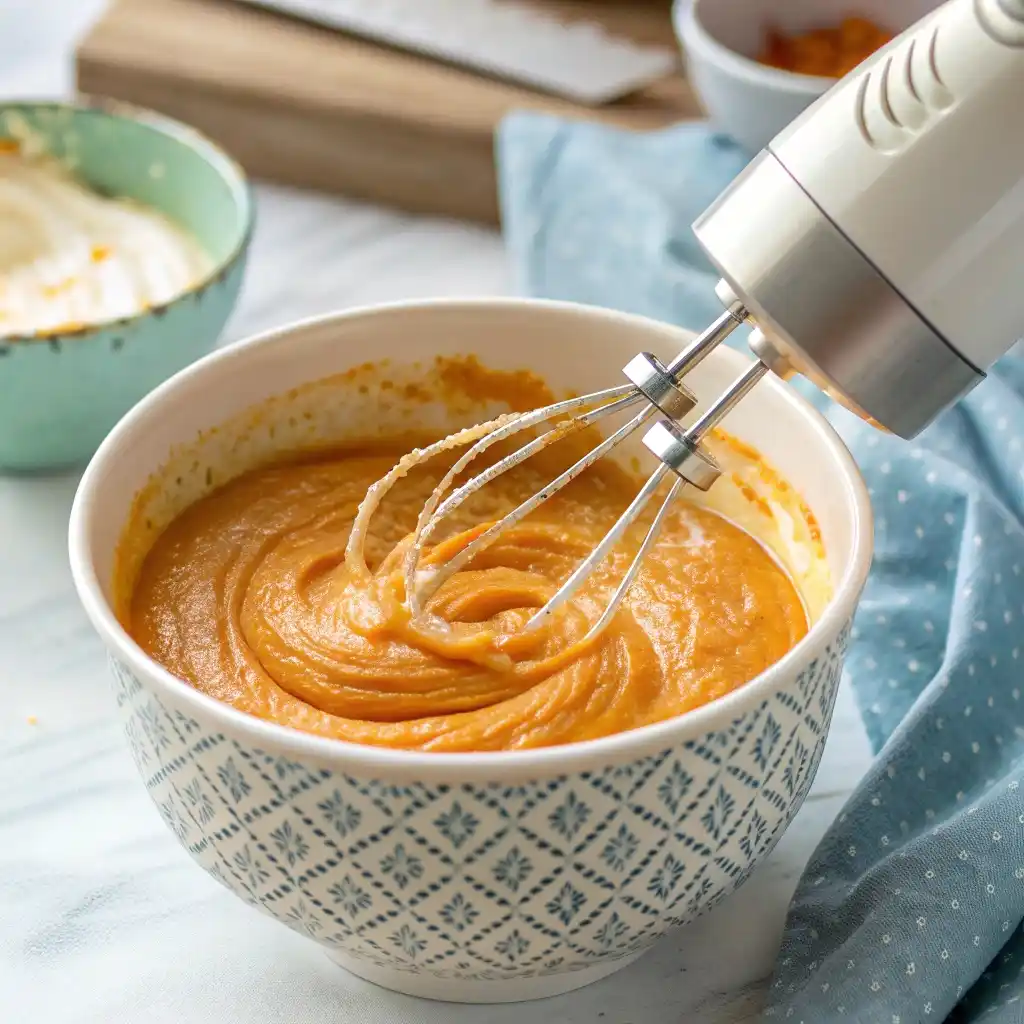
- Make the Cheesecake Filling: In a large bowl, beat softened cream cheese with an electric mixer until smooth and creamy. Add pumpkin purée, powdered sugar, vanilla, pumpkin pie spice, and cinnamon. Mix until fully blended.
- Whip the Cream: In a separate chilled bowl, whip the heavy cream until stiff peaks form. Gently fold the whipped cream into the pumpkin mixture using a spatula, working in thirds to maintain airiness.
- Assemble the Cups: Spoon or pipe the pumpkin cheesecake filling over the chilled crust in each jar. Smooth the tops or tap lightly to remove air bubbles. Cover with lids or plastic wrap and refrigerate for at least 3 hours or overnight.
- Add the Toppings: Before serving, top each cup with whipped cream, a sprinkle of cinnamon, and optional garnishes such as caramel drizzle or chopped pecans.
- Serve & Enjoy: Keep chilled until serving time. Serve directly from the jars with small spoons for an elegant and effortless presentation.
Notes
- Make-Ahead: These no-bake pumpkin cheesecake cups can be made up to 2 days in advance. Add whipped cream just before serving.
- Freezing: Freeze the pumpkin cheesecake filling (without crust) for up to 1 month. Thaw in the fridge before layering.
- Texture Tip: Cold heavy cream and softened cream cheese are the key to a smooth, stable filling.
- Jar Options: Use glass jars, ramekins, or dessert cups — they travel well and make beautiful gifts.
- Flavor Variations: Try gingersnap crumbs for a spicier crust or swirl in a touch of maple syrup before chilling.
- Prep Time: 15 minutes
- Chill time: 3 hours
- Cook Time: 0 minutes
- Category: Dessert
- Method: No-Bake
- Cuisine: American
Nutrition
- Serving Size: 1 jar (approx. 6 oz)
- Calories: 325 kcal
- Sugar: 18 g
- Sodium: 165 mg
- Fat: 23 g
- Carbohydrates: 26 g
- Fiber: 1 g
- Protein: 4 g
- Cholesterol: 65 mg
Ingredients & Why They Work
Every spoonful of these no-bake pumpkin cheesecake cups depends on harmony — the right ratio of creamy to crunchy, the right spice mix, and ingredients that hold their own when chilled. Here’s how each part comes together.

The Graham Crust
- Graham cracker crumbs (1 cup): Their sweet, toasty flavor provides the nostalgic base of a good cheesecake.
- Light brown sugar (2 tablespoons): Adds subtle caramel undertones and helps the crust firm when chilled.
- Unsalted butter, melted (4 tablespoons): Binds the crumbs and infuses that unmistakable buttery richness.
Texture Tip: After mixing, the crumbs should resemble damp sand — moist enough to hold together, never greasy. Press lightly into the bottom of each jar and chill while preparing the filling.
💡 If you prefer a twist, try a gingersnap crust like the one used in my Maple Honeycrisp Apple Fritters; the spice pairs beautifully with pumpkin.
The Pumpkin Cheesecake Filling
- Cream cheese (8 oz, softened): Provides structure and a gentle tang that balances the pumpkin’s sweetness. Use full-fat block cream cheese for the best texture.
- Pumpkin purée (1 cup): Smooth, earthy, and unmistakably fall. Canned purée ensures consistent thickness.
- Powdered sugar (½ cup): Dissolves instantly for a silky finish, keeping the filling smooth instead of grainy.
- Vanilla extract (1 teaspoon): Enhances sweetness and rounds out the spice.
- Pumpkin pie spice (1 teaspoon) + ground cinnamon (½ teaspoon): Layered warmth that defines creamy pumpkin desserts — aromatic without overpowering.
- Cold heavy whipping cream (1 cup): Whipped and folded in, it gives the filling its signature airy lift and mousse-like consistency.
When combined, these create the luscious body of the pumpkin cheesecake jars — sturdy enough to hold shape, soft enough to melt on the tongue.
Toppings & Garnish
- Whipped cream: Adds lightness and visual contrast.
- Ground cinnamon or nutmeg: For a fragrant finish.
- Optional extras: Caramel drizzle, candied pecans, or crushed graham crackers for texture and flair.
Presentation Tip: Arrange your jars on a serving tray surrounded by cinnamon sticks and mini pumpkins — a simple way to give your make ahead Thanksgiving desserts a centerpiece feel.
Ingredient Insights & Hosting Tips
- Soften the Cream Cheese: Let it rest at room temperature for 30 minutes before beating. Soft cream cheese ensures a smooth, lump-free texture in your no bake pumpkin cheesecake cups.
- Keep the Cream Cold: Cold cream whips faster and holds its peaks, helping your fall dessert cups maintain structure without gelatin.
- Balance the Sweetness: Pumpkin is naturally mild; a touch of brown sugar or maple syrup enhances depth without overwhelming the spice.
- Use the Right Containers: Six-ounce glass jars or dessert cups are ideal — they chill evenly and showcase the layers beautifully.
- For Gifting: Seal each thanksgiving dessert in a jar with a lid, tie twine around the rim, and add a mini spoon. It’s a simple but thoughtful seasonal gift.
💡 If you’re serving a full meal, these pair wonderfully with the savory richness of my Sweet Potato and Butternut Squash Soup; the contrast of flavors feels perfectly balanced for fall.
Step-by-Step Method
Step 1 – Prepare the Crust
In a medium bowl, stir together the graham cracker crumbs and brown sugar. Pour the melted butter over the mixture and combine until evenly moistened. The texture should look like soft, golden sand.
Spoon two tablespoons of this mixture into each serving jar or glass. Using the back of a spoon, press lightly to form a firm base. Slide the pumpkin cheesecake jars into the refrigerator while you build the filling. The quick chill helps the crust set before the creamy layer goes on top, ensuring each bite of these no bake pumpkin cheesecake cups has structure and crunch.
Step 2 – Make the Pumpkin Cheesecake Filling
In a large mixing bowl, beat the softened cream cheese until perfectly smooth; a handheld or stand mixer on medium speed works best. Add the pumpkin purée, powdered sugar, vanilla, pumpkin pie spice, and cinnamon. Beat again until everything blends into a pale orange, velvety base.
This mixture forms the heart of your creamy pumpkin desserts — thick but not heavy, sweet but balanced. Scrape down the sides of the bowl to capture every bit of spice and ensure a uniform flavor.
Step 3 – Whip the Cream
In a separate chilled bowl, pour the cold heavy cream. Beat on medium-high until stiff peaks hold their shape. Properly whipped cream is what transforms dense cheesecake batter into the light, cloud-like texture we love in no bake fall desserts.
Once whipped, gently fold the cream into the pumpkin mixture in three additions. Use a broad spatula and a light hand — think “lift and turn,” not “stir and deflate.” The goal is an airy, mousse-style filling that still tastes rich. When finished, the mixture should look smooth, glossy, and thick enough to hold soft peaks.
Step 4 – Layer the Cups
Retrieve the jars with the chilled crust. Spoon or pipe the filling over each crust layer, leaving about half an inch of headspace for toppings. If you want an extra-neat finish, transfer the mixture to a piping bag with a large round tip.
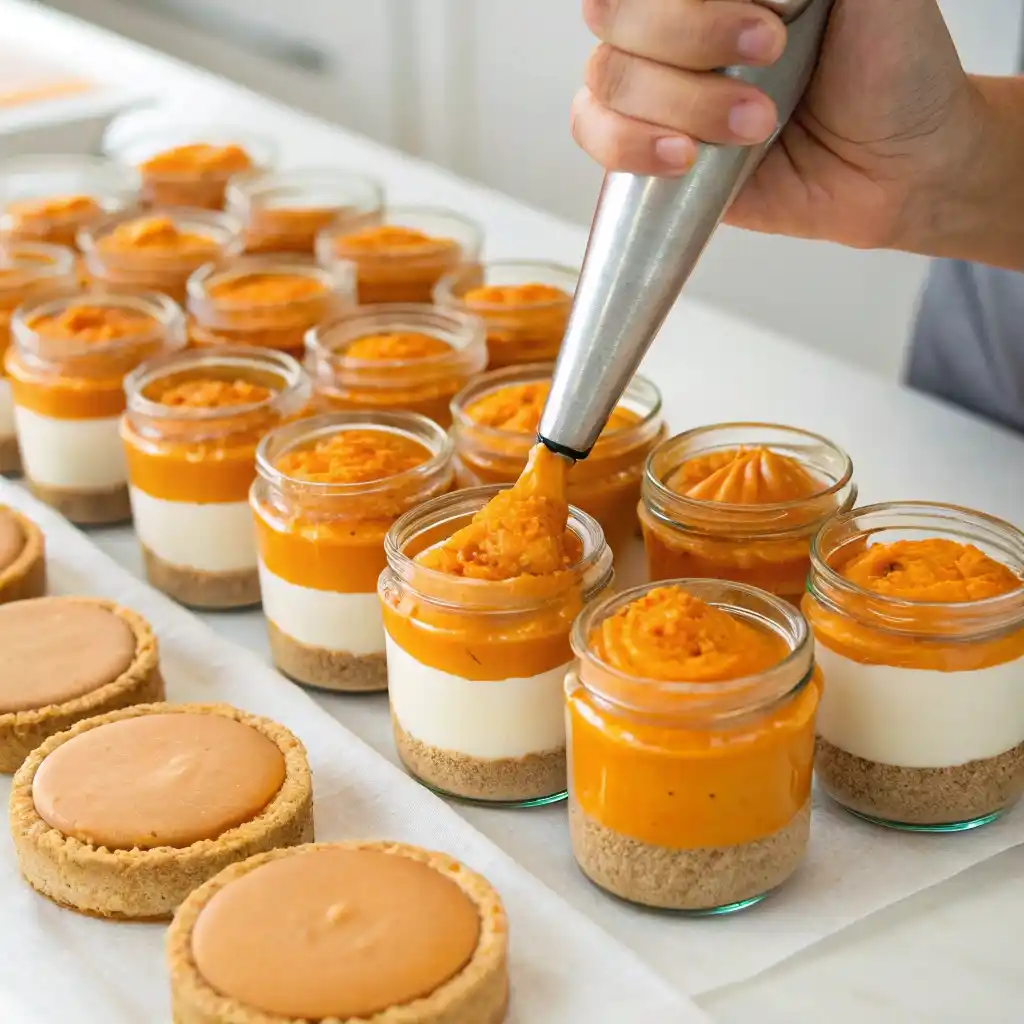
Tap each jar lightly on the counter to remove air pockets and level the surface. You’ll notice how the filling’s golden-orange hue catches the light — one of the prettiest signs that your fall dessert cups are on their way to perfection.
Cover each jar tightly with plastic wrap or lids. Place them in the refrigerator for at least 3 hours, preferably overnight. This slow chill is key: the butter in the crust solidifies, and the air in the whipped cream settles, giving your no bake pumpkin cheesecake cups a clean slice-by-spoon texture.
Step 5 – Add the Finishing Touches
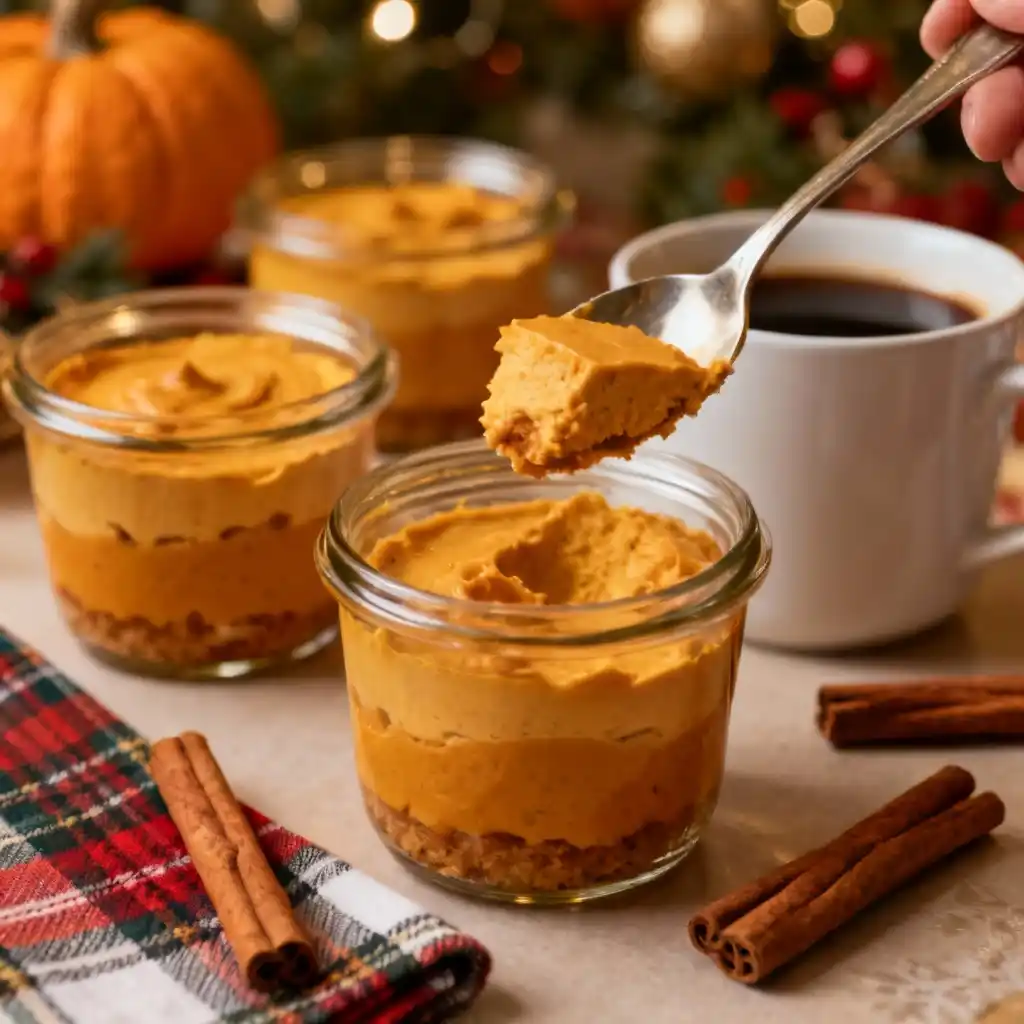
Just before serving, remove the jars from the refrigerator. Top each with a swirl of whipped cream — you can spoon it casually for a rustic look or pipe it high for a festive flourish. Dust lightly with cinnamon or nutmeg, then finish with a sprinkle of graham crumbs or a drizzle of caramel.

At this moment, the dessert transforms from simple to show-stopping. The layers contrast beautifully: crumbly crust, creamy pumpkin, airy whipped cream. It’s a trifecta of texture and flavor that defines make ahead Thanksgiving desserts.
Color & Texture Cues
Learning the visual language of these pumpkin cheesecake jars helps guarantee perfect results every time:
- Filling Consistency: Before chilling, it should resemble soft frosting — smooth, spreadable, and slightly airy. If it’s too loose, fold gently once more; if it’s stiff, let it rest at room temperature for 5 minutes.
- Set Texture: After at least 3 hours in the fridge, the filling firms up but remains spoon-tender. When you press lightly with a spoon, it should give slightly, then spring back — the hallmark of truly creamy pumpkin desserts.
- Color Cue: The chilled filling deepens to a rich amber-pumpkin tone with faint spice flecks. Against the pale crust, it signals that your no bake pumpkin cheesecake cups have set perfectly.
- Crust Check: A fork should slide cleanly through without crumbling apart, confirming that butter and sugar bound properly.
If you’re preparing these as part of a dessert buffet or board, keep them covered until serving. The cool jars maintain shape for up to 2 hours at room temperature — ideal for gatherings where presentation matters as much as taste.
Timing and Make-Ahead Notes
For best flavor, chill overnight. The spices bloom, the sweetness mellows, and the crust softens slightly to meet the creamy layer. You can prepare these no bake pumpkin cheesecake cups up to 48 hours in advance.
They’re travel-friendly, too: screw-top mason jars keep everything secure. Bring them to a family gathering, line them on a dessert table beside Cranberry Brie Bites or Caramel Apple Snack Mix, and you’ll have a display that feels festive yet effortless — the definition of make ahead Thanksgiving desserts.
Make-Ahead, Storage & Shipping Tips
One of the best reasons to love these no bake pumpkin cheesecake cups is their flexibility. They fit perfectly into the rhythm of fall entertaining — mix, chill, and forget about them until guests arrive.
Make-Ahead Schedule
You can assemble these pumpkin cheesecake jars up to two days before serving. In fact, the extra time helps the flavors deepen — the spices mellow, the pumpkin flavor rounds out, and the crust softens slightly, blending into that creamy base. Simply add whipped cream and garnishes right before serving for the freshest look.
Storage Tips
- Refrigeration: Cover each jar tightly with its lid or plastic wrap and refrigerate for up to four days. The filling stays silky, and the crust maintains just enough texture to hold its shape.
- Freezing: If you’d like to prepare further in advance, you can freeze the pumpkin filling (without the crust) for up to one month. Thaw overnight in the refrigerator, then layer and chill again before serving.
- Serving Temperature: These fall dessert cups taste best slightly chilled, not icy. Take them out of the fridge 15 minutes before serving to let the flavors open up.
Gifting & Travel
For edible gifts, pack each thanksgiving dessert in a jar with a ribbon and small spoon attached. The jars travel beautifully for potlucks, office parties, and family dinners. They’re also perfect additions to a make ahead Thanksgiving desserts board — imagine these little jars nestled among cookies, bars, and truffles.
If you’re traveling a few hours, place the jars in a cooler with an ice pack. They’ll hold perfectly, ready to serve at your destination with minimal fuss.
Variations
A good recipe is a foundation — and these no bake pumpkin cheesecake cups are the perfect canvas for creative flavor twists.
Gingersnap Crust
Swap the graham crackers for crushed gingersnaps. The extra spice intensifies the pumpkin flavor, adding warmth and depth to your creamy pumpkin desserts.
Maple Swirl
Add a drizzle of pure maple syrup between the crust and the filling before chilling. It seeps lightly into the layers, giving your pumpkin cheesecake jars a sweet, amber note and beautiful ripple effect.
Chocolate Pumpkin Cups
Layer the filling over crushed chocolate wafer cookies for a richer contrast — a decadent variation for chocolate lovers that still qualifies as no bake fall desserts.
Pecan Crunch
Top with chopped toasted pecans before serving for a nutty texture that complements the smooth cheesecake layer.
Each variation keeps the spirit of the recipe intact while offering new ways to present and personalize your make ahead Thanksgiving desserts.
Serving & Gifting Ideas
When it’s time to serve, think presentation and atmosphere. These fall dessert cups shine with minimal effort:
- Arrange them on a rustic wooden tray lined with mini pumpkins, cinnamon sticks, and sprigs of rosemary for a farmhouse-style centerpiece.
- For a dessert buffet, alternate pumpkin cheesecake jars with cookies like Cranberry Pistachio Shortbread Cookies for color and texture contrast.
- Add a small dessert tag — “No Bake Pumpkin Cheesecake Cups” — so guests know exactly what to grab.
- If hosting Thanksgiving, include them alongside cozy recipes like Pumpkin Bread with Cream Cheese Swirl or Caramel Apple Snack Mix. The combination of sweet, spiced, and crunchy turns your table into a holiday spread guests will remember.
FAQs for No-Bake Pumpkin Cheesecake Cups
Can I make these no bake pumpkin cheesecake cups ahead of time?
Absolutely. These are one of the easiest make ahead Thanksgiving desserts. Assemble and chill up to two days in advance, then garnish just before serving.
Can I use store-bought whipped topping?
Yes — it’s a reliable shortcut that holds its shape longer than homemade whipped cream, especially if you’re transporting your pumpkin cheesecake jars.
How long do they last in the fridge?
Stored properly, these fall dessert cups stay fresh for four days. The crust softens slightly, creating that classic creamy-to-crunchy balance.
Can I make them dairy-free or gluten-free?
Definitely. Use dairy-free cream cheese and coconut whipped cream for a lactose-free version, and swap gluten-free graham crackers to keep it celiac-safe.
How do I know when the filling has set?
After at least three hours of chilling, the filling should look firm yet soft to the touch — it should yield slightly, not wobble. That’s when your creamy pumpkin desserts are ready.
Can I serve them warm?
No-bake cheesecake should always be served chilled. Let them sit at room temperature briefly if you prefer a softer bite, but don’t heat or microwave — it’ll melt the structure.
Conclusion
These no bake pumpkin cheesecake cups combine everything we love about fall — the comfort of pumpkin spice, the ease of make-ahead prep, and the elegance of a dessert that looks as good as it tastes. With buttery crust, creamy filling, and aromatic spice, every spoonful captures the cozy side of the season.
Whether you’re curating make ahead Thanksgiving desserts for the holiday table, packing pumpkin cheesecake jars for gifts, or just treating yourself to a sweet moment after dinner, this recipe delivers warmth and beauty with minimal effort.
Save this recipe to your Pinterest board and let it become one of your go-to creamy pumpkin desserts every autumn. Because once you’ve had cheesecake that’s this easy, this lovely, and this delicious — you’ll wonder why you ever baked one at all.