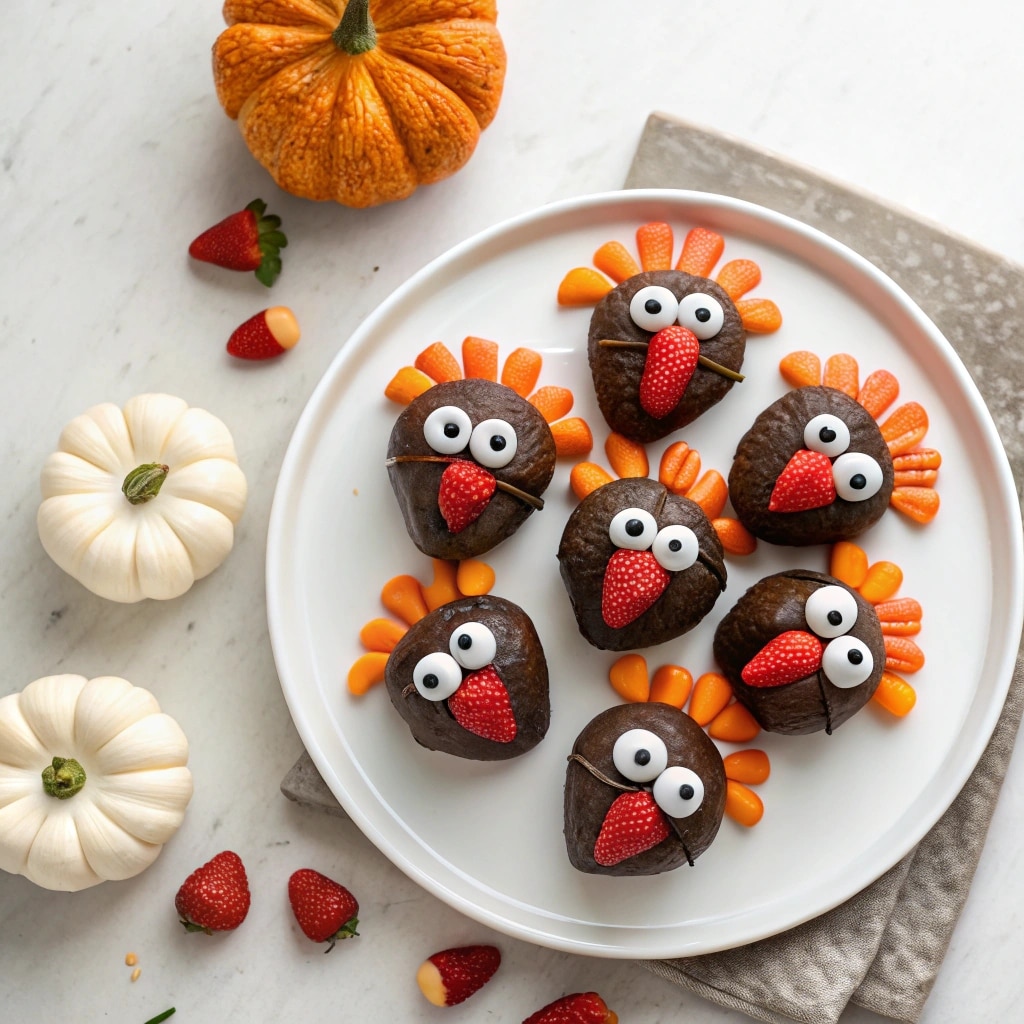
Chocolate covered strawberry turkeys are the cheerful little showstoppers your Thanksgiving table didn’t know it needed. Fresh berries wear glossy chocolate “feathers,” tiny candy eyes, and pretzel-marshmallow drumsticks, turning a classic dipped strawberry into a cute, no-bake centerpiece. They’re fast to assemble, easy to transport, and the first thing kids (and honestly, every adult) reach for on the dessert board. If you’re building a lineup of quick holiday sweets, these strawberry turkeys slide right in beside creamy cup desserts like No Bake Pumpkin Cheesecake Cups and other make-ahead treats.
Here’s the promise: simple ingredients, a calm dipping flow, and clean finishes—no candy chaos required. You’ll melt chocolate at low power, dip, set, and decorate in tidy stages, so each turkey looks neat and travel-ready. Whether you’re sending a platter to a class party, decorating the kids’ table, or topping a pie with a few feathered friends, this tutorial keeps everything clear and do-able. Bookmark, pin, and let these charming, chocolate covered strawberry turkeys become your new November tradition.
Table of Contents
Why You’ll Love These Strawberry Turkeys
They’re no bake and genuinely fast. With a light assembly line, you can finish a whole tray in about 15 minutes once ingredients are laid out. The texture is spot-on: snap from the chocolate shell, juicy berry inside, and a playful crunch from pretzels. Because they’re fruit-forward, they feel lighter than many Thanksgiving chocolate strawberries or other heavy sweets, so guests happily add one to their plate after pie.
They’re also budget-friendly and flexible. Swap milk, dark, or white coating; keep decorations minimal or go full “turkey costume.” For parties, these kid friendly Thanksgiving desserts are a slam dunk: they hold up on a buffet, they pack easily, and you don’t need special molds. The best part? Clear, repeatable steps mean every batch looks polished enough for gifting or a holiday dessert board.
Print
Chocolate Covered Strawberry Turkeys
- Total Time: 15 minutes
- Yield: 20–24 strawberry turkeys 1x
- Diet: Vegetarian
Description
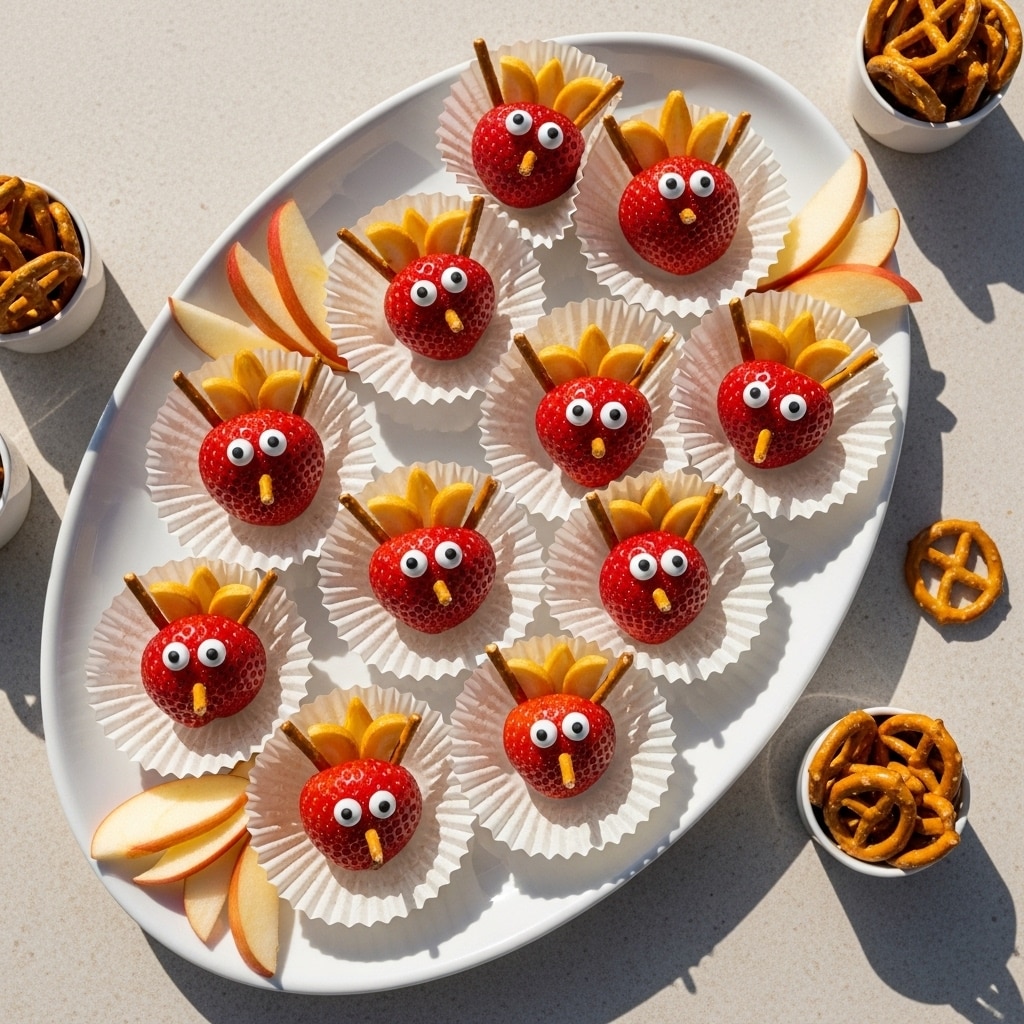
Fresh strawberries dipped in glossy chocolate, then decorated with candy eyes, tiny beaks, and pretzel-marshmallow “drumsticks.” A 15-minute, no-bake Thanksgiving treat that packs and travels beautifully.
Ingredients
Bodies
- 1 ½ pounds large strawberries, thoroughly dried (leaves on)
- 10–12 ounces chocolate coating wafers or finely chopped real chocolate (milk, dark, or white)
- ½–1 teaspoon neutral oil (optional, to thin)
Decorations
- 24 mini pretzel sticks (or thin rods), halved
- 12 mini marshmallows, halved (drumsticks)
- 24–36 candy eyes
- 24 mini orange or butterscotch chips (beaks)
- Red candy bits or a spoonful of red candy melt (wattle)
- Optional: contrasting melts for tail lines (white/dark/caramel)
Instructions
- Prep
Line a sheet pan with parchment. Rinse strawberries and pat completely dry—tops, sides, and around the leaves. Moisture will dull chocolate. - Melt
Place wafers or finely chopped chocolate in a microwave-safe bowl. Heat at 50% power in 20–30 second bursts, stirring between each, until smooth and glossy. Thin with a little neutral oil only if needed. - Dip bodies
Hold each berry by the leaves and dip, twirling to coat. Let excess drip, tap gently for a thin shell, scrape the bottom edge on the bowl rim, and set on parchment. Repeat, spacing berries so they don’t touch. - Make drumsticks
Halve mini marshmallows. Dab a little melted chocolate on the cut side and press onto one end of a halved pretzel stick. Set 2–3 minutes to firm. - Add faces
Dot a tiny bit of melted chocolate on the front of each berry; attach a mini orange chip as a beak, a small red candy for the wattle, and two candy eyes above the beak. - Attach drumsticks
Swipe a little melted chocolate on the plain end of each pretzel and adhere two “legs” near the base of the berry at a slight outward angle. Hold a few seconds to set. - Tail lines (optional)
Pipe 3–4 short curved lines on the back half of each berry with contrasting melt, or do a quick back-curve dip for a feather stripe. - Set and serve
Let stand at cool room temperature until firm (or chill 5–8 minutes). Transfer to mini liners and serve the same day, or refrigerate up to 24–36 hours.
Notes
- Real chocolate vs wafers: real chocolate tastes richer but is heat-sensitive; wafers are stress-free for beginners.
- Moisture control: dry fruit thoroughly; keep containers closed while coming to room temp to avoid condensation.
- Make-ahead: assemble faces/drumsticks a day early; dip and finish the next morning for best gloss.
- Variations: dark shells with white accents; white “snow” turkeys; sprinkle-only faces; gluten-free pretzels.
- Prep Time: 15 minutes
- Cook Time: 0 minutes
- Category: Dessert
- Method: No-Bake
- Cuisine: American
Nutrition
- Serving Size: 1 decorated strawberry
- Calories: 70 kcal
- Sugar: 7 g
- Sodium: 20 mg
- Fat: 3.5 g
- Carbohydrates: 9 g
- Fiber: 1 g
- Protein: 0.8 g
- Cholesterol: 0 mg
Ingredients & Tools
A short, sensible list keeps these turkey chocolate covered strawberries easy to pull off. Dry berries and fluid chocolate do most of the heavy lifting; the decorations are tiny but impactful.
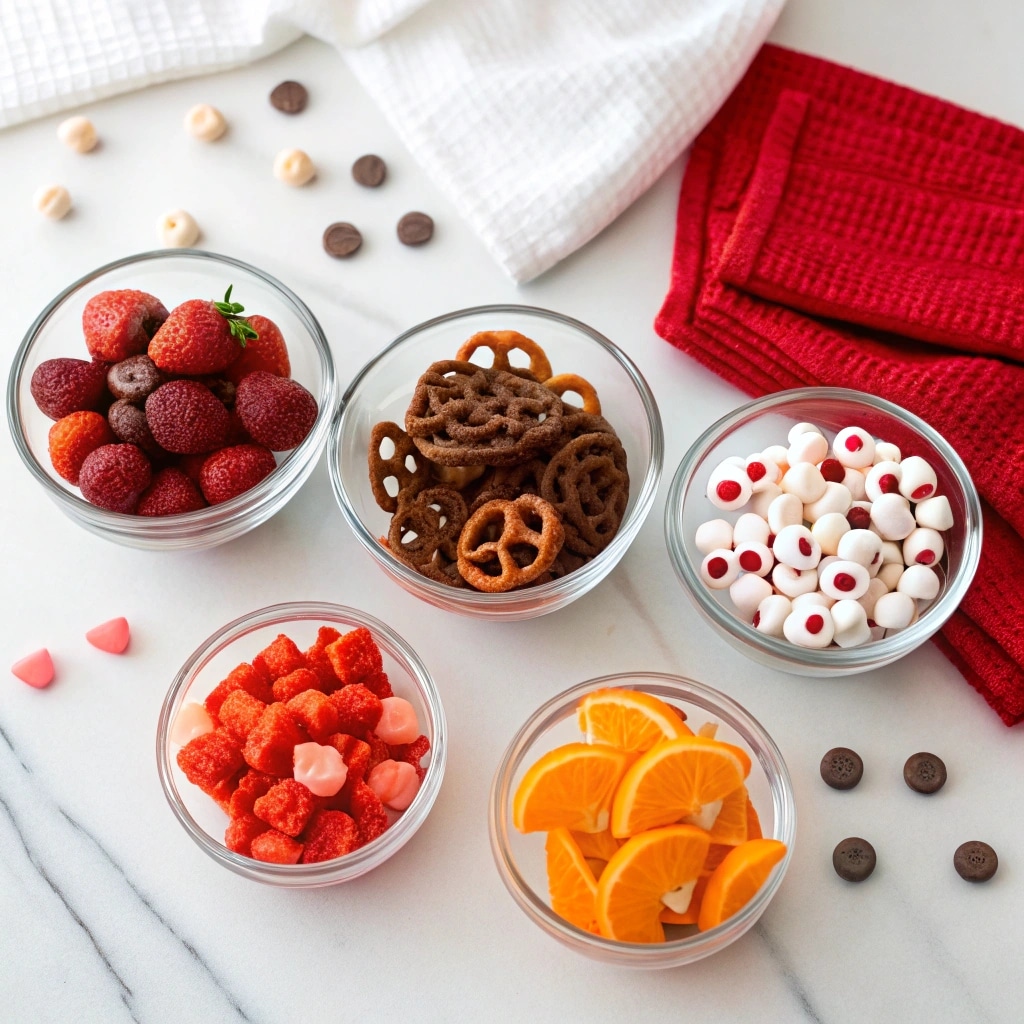
Core Ingredients (and why they work)
- Large fresh strawberries, completely dry
Dry berries = glossy shells that set fast and clean. Leaves on top give you a natural “handle” for dipping. - Chocolate coating wafers or real chocolate, finely chopped
Wafers/almond bark are the most forgiving for no bake Thanksgiving treats (no tempering). Real chocolate tastes richer but needs gentle heat and dry tools. - Mini pretzel sticks or thin rods
Crunch and structure for legs/feet; they press into chocolate easily. - Mini marshmallows
Cut in half for “drumsticks”; they adhere with tiny dots of melted chocolate. - Candy eyes
Instantly reads “turkey” and saves piping time. - Orange or butterscotch chips (for beaks) + a red melt or candy bit (for wattle)
Simple color pops; tiny pieces go a long way. - Neutral oil (optional)
A ½–1 teaspoon thins thick coating to a smooth ribbon if needed.
Helpful Tools
- Parchment-lined sheet pan
Nonstick staging for dipped berries and decorations. For lining tips and neat edges on sweets, see the setup notes in Maple Pecan Cookie Bars. - Two forks (dip + lift) or a dipping fork
Control and clean bases without heavy “feet.” - Small squeeze bottle or piping bag (optional)
For quick feather lines or tiny chocolate “glue.” - Paper towels
Final dry-off for berries (moisture is the enemy of smooth chocolate). - Microwave-safe bowl + kitchen towel
The towel under the bowl helps maintain gentle warmth between dipping rounds.
Ingredient Notes at a Glance
If you’re making turkey chocolate covered strawberries for travel, choose slightly firm berries (not overripe). Dark chocolate gives a classic look; milk chocolate reads sweeter and kid-friendly. White chocolate makes adorable “snow turkeys,” especially with dark chocolate details. Keep decorations small and consistent so the faces align easily and the shells stay neat.
Step-by-Step Method
Prep Strawberries for Dipping
Wash, Dry, and Destem Strategy
Rinse strawberries under cool water and spread them on a clean towel. Pat completely dry—tops, sides, and around the leaves. Any moisture will seize chocolate or create streaks. Keep the green tops on to use as a natural handle. If some leaves are very long, trim the edges with kitchen scissors so they won’t dip into the coating. Line a sheet pan with parchment and set it beside your work area so dipped berries can land and set immediately.
Melt Chocolate at 50% Power
Fluid, Glossy, Not Overheated
Place coating wafers or very finely chopped real chocolate in a microwave-safe bowl. Heat at 50% power in 20–30 second bursts, stirring between each, until just melted and smooth. The goal is a gentle, pourable ribbon—glossy and fluid, not hot or thick. If the texture seems heavy, stir in ½–1 teaspoon neutral oil to loosen. Set the warm bowl on a folded kitchen towel; the towel holds mild heat so the coating stays workable while you build your chocolate covered strawberry turkeys.
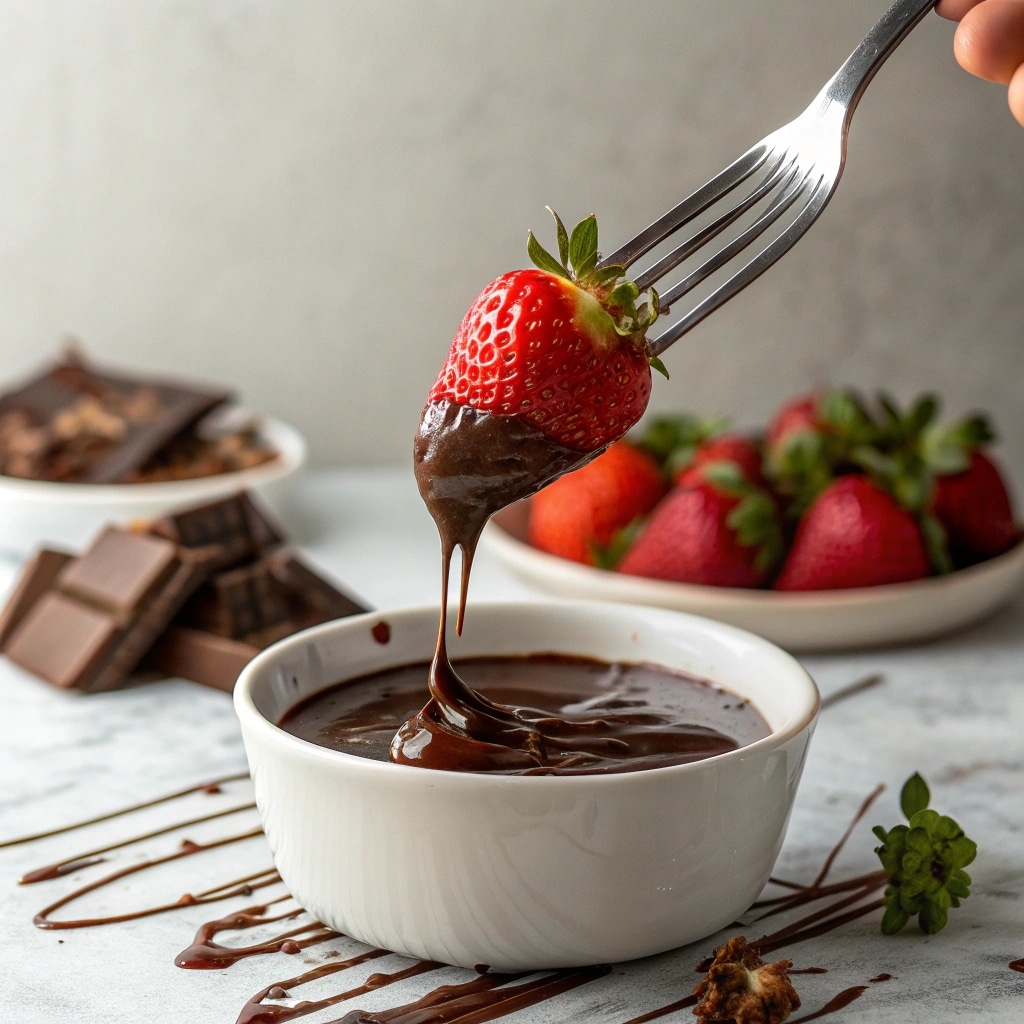
Dip and Set the Bodies
Tap, Scrape, Slide
Work in small batches so the coating stays fluid and your chocolate covered strawberry turkeys look uniform. Hold one strawberry by the leaves (or a toothpick) and dip at a slight angle. Twirl to coat, lift, and let excess drip.
Tap your wrist gently to encourage a thin, even shell—thin shells look glossier and set faster. Lightly scrape the base on the bowl rim to avoid a thick “foot,” then slide the berry onto parchment. Repeat, spacing berries so they don’t touch as they set. For a subtle turkey tail effect, re-dip just the back curve and let a second, thinner layer flow downward. This quick rhythm helps every chocolate covered strawberry turkey set cleanly and stack well on a platter.
Build the Turkey Details
Drumsticks First (Mini Marshmallow + Pretzel)
While bodies set, make the “drumsticks.” Halve mini marshmallows crosswise. Dab the cut side in a tiny dot of melted chocolate and press onto one end of a short pretzel stick. Set on parchment 2–3 minutes to firm. These add crunch and the playful silhouette that makes chocolate covered strawberry turkeys instantly recognizable.
Beak, Wattle, and Eyes

Add the face so details adhere neatly. Dot a small amount of melted chocolate on the front of each berry; press on a mini orange or butterscotch chip as the beak (point outward). Add a tiny red candy or dab of red melt for the wattle, then place two candy eyes slightly above the beak. Keep glue dots minimal—too much chocolate under decorations can slide before setting and blur the features of your strawberry turkeys.
Attach Drumsticks
When shells are set but not rock-hard, attach the legs. Swipe a little melted chocolate on the plain end of each pretzel and adhere two “drumsticks” near the base of the berry at a slight outward angle. Hold a few seconds until they grab. If a piece shifts, nudge it back, pause a minute, and continue. This staged approach keeps every chocolate covered strawberry turkey tidy and sturdy.
Tail Feathers (Optional, Two Easy Looks)
Option A: Contrast Dip Lines
Warm a tablespoon or two of contrasting melts (white, caramel, or colored). Dip just the back curve quickly and lift to leave a curved stripe that reads like tail feathers.
Option B: Squeeze-Bottle Feathers
Fill a small squeeze bottle or piping bag with melted chocolate and draw 3–4 short, curved lines on the back half of each berry. Keep strokes light so lines set crisp and don’t overpower the faces.
If you love a tidy holiday flow, assemble in short stations—dip all bodies, add faces, then legs, then tails. For another fast fall dessert you can prep in stages, see the cooling rhythm in Apple Cider Blondies.
Color & Finish Cues
Gloss, Streaks, and Quick Fixes
Properly melted coating sets with a gentle shine—exactly what makes chocolate covered strawberry turkeys look polished. Dull or streaky patches usually mean the chocolate cooled too much or met moisture. Rewarm in 10–15 second bursts at 50% power and stir until glossy. If a candy eye smudges, lift it off, swipe the smear with a clean toothpick, and re-dot a tiny bit of chocolate to reset the eye. For neat bases, snap off any fine “skirts” after shells are firm with a quick nudge of a paring knife. This light touch preserves the clean lines and cheerful faces that make your strawberry turkeys irresistible.
Set, Move, and Serve
Chill Briefly, Then Box
Let the decorated berries rest at cool room temp until fully set (10–15 minutes for coating wafers; a bit longer for real chocolate). If your kitchen is warm, slip the tray into the fridge for 5–8 minutes—just enough to firm without condensation. Transfer the finished strawberry turkeys to mini paper liners on a clean tray or platter. If you’re transporting to a party, arrange in a single layer in a parchment-lined box; add a second parchment sheet and a very light second layer only if the decorations are fully set and rigid.
With this calm, staged approach—dry fruit, low-power melting, tidy dips, and minute details—you’ll turn out a polished platter of chocolate covered strawberry turkeys that travels beautifully and looks as adorable as it tastes.
Make-Ahead, Storage & Transport
Planning ahead with chocolate covered strawberry turkeys is simple if you manage moisture and temperature. Dry fruit, thin even shells, and set decorations make them sturdy for parties and school events—super handy when you’re juggling pies and mains.
Make-ahead timeline
- Same day: Dip and decorate in the morning for evening parties. Let set at cool room temp, then hold refrigerated in a shallow, parchment-lined container.
- 1 day ahead: Wash and dry berries, then refrigerate uncovered on a towel-lined tray to wick surface moisture. Dip and decorate the next day for the glossiest finish.
- 2 days ahead (max): Fully decorate, then box in a single layer. Expect the shells to stay crisp, but berries will naturally soften a touch.
Storage tips
- Room temperature (cool kitchen): Up to 2 hours once set. Keep out of direct sun and away from the oven.
- Refrigerated: 24–36 hours is the sweet spot. Use a parchment-lined, lidded container; add mini paper liners to prevent bumps. Open briefly when serving to limit condensation.
- Freezing: Not recommended. Strawberries release water as they thaw, dulling the shells and loosening decorations.
Transport without smudges
- Single layer only, snug but not crowded. Add a slip of parchment to create gentle “lanes” so turkeys don’t slide.
- Chill the box 10 minutes before leaving; a cool shell travels better in a warm car.
- For potlucks, pack a simple tent card and a second treat with contrasting texture, like chewy squares of Pecan Pie Blondies. The mix of fresh, juicy berries and nutty bars makes the dessert table feel balanced.
Variations
A few small tweaks keep your tray playful while the method stays stress-free. Each option still reads as chocolate covered strawberry turkeys, just with a different “personality.”
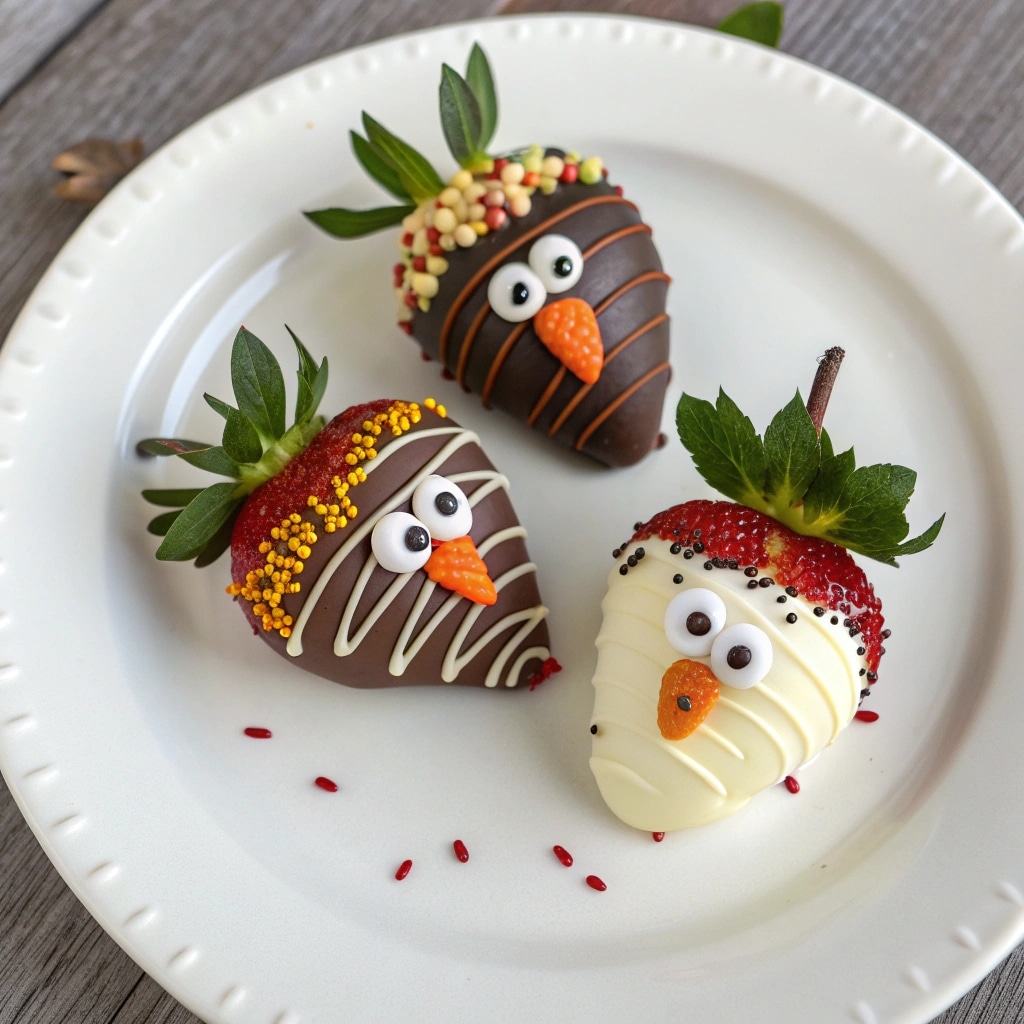
Dark chocolate bodies
Use semisweet or 60% dark for the dip and add white chocolate accents for eyes and feather lines. The contrast photographs beautifully and tastes a little less sweet.
White chocolate “snow” turkeys
Dip in white coating and drizzle with milk or dark chocolate tail lines. Use mini orange chips for beaks so the face still pops against the pale shell.
Sprinkle-only faces
Skip candy eyes and pipe two tiny white dots, then add micro chocolate dots for pupils. Finish with a pinch of autumn-hued sprinkles along the back to suggest feathers—fast and kid-proof.
Pretzel-free (gluten-friendly) legs
Swap pretzels for thin gluten-free pretzel sticks or omit legs entirely and emphasize tail feather lines. The turkey silhouette still reads thanks to the beak/eyes combo.
Mini strawberries (cupcake toppers)
Choose smaller berries, dip as usual, and keep decorations tiny. Set one topper on a swirl of frosting—adorable on cupcakes or a brownie slab.
Caramel feather drizzle
Warm a spoonful of thick caramel and thread a few fine lines across the back half only. Keep them thin so the caramel sets and doesn’t slide.
For color and texture contrast on a holiday tray, add bright squares of Cranberry Orange Shortbread Bars next to your strawberry turkeys—the ruby glaze and buttery crumb make the whole spread pop.
Serving & Kids’ Table Ideas
Set chocolate covered strawberry turkeys on a bright white platter so the faces pop and the shells look glossy. Add a few mini pumpkins or simple place cards to turn them into edible décor. For kids’ table fun, arrange the strawberry turkeys in a ring and tuck tiny cups of pretzels, popcorn, and apple slices in the center—colorful, finger-friendly, and easy to pass. If you’re building a bigger dessert board, mix these with a chewy square or two so textures vary; caramel lovers will swoon next to Salted Caramel Apple Crumble Bars.
For party trays, think portion planning: two chocolate covered strawberry turkeys per guest is a safe baseline when other sweets are present. If this is the star of your kid friendly Thanksgiving desserts, plan on three per person. For an adults-only coffee spread, pair with plain shortbread or nuts so the fruit stays center stage. And if you need a quick savory counterpoint on the buffet, set a small platter of Cranberry Brie Crostini nearby—sweet berries and creamy brie play well together and help the board feel complete.
FAQs
Why can’t you put chocolate-covered strawberries in the fridge?
You can refrigerate them briefly, but long, cold storage encourages condensation when they come back to room temperature. That moisture dulls the glossy shell and can loosen decorations. For chocolate covered strawberry turkeys made the morning of your event, chill just 5–10 minutes to set, then hold in a cool room or refrigerate up to 24–36 hours in a covered, parchment-lined container and open right before serving.
How to get chocolate to stick to strawberries?
Start with bone-dry berries. Rinse, then pat every surface dry—tops, sides, and around the leaves. Any water stops chocolate from adhering. Use smoothly melted coating (50% microwave power, short bursts) and dip while it’s fluid and glossy. Tap off excess, scrape the base on the bowl rim, and place on parchment so the shell sets flat.
What is the secret to chocolate-covered strawberries?
Three things: absolutely dry fruit, low-and-slow melting, and thin, even shells. For our chocolate covered strawberry turkeys, keep the bowl warm on a folded towel so the coating stays fluid; decorate in stages (faces, legs, tails) so each element sets before moving the berries. Minimal handling = shiny results.
What is the best chocolate to melt to cover strawberries?
Coating wafers (or almond bark) are the most forgiving—no tempering and a reliable shine. Real chocolate (milk, semisweet, or white) tastes richer but needs gentle heat and totally dry tools. If using real chocolate, chop very fine, melt at 50% power in short bursts, and stir often; add ½–1 teaspoon neutral oil only if the flow needs loosening.
How long do chocolate-covered strawberries take to set in the fridge?
Typically 5–15 minutes, depending on thickness and type of coating. For decorated chocolate covered strawberry turkeys, chill just until firm to the touch, then move them to a lined container. Over-chilling can cause condensation later, so keep fridge time short and controlled.
How to prevent chocolate-covered strawberries from sweating in the fridge?
Limit cold exposure and control temperature swings. After chilling to set, store berries covered in a shallow, parchment-lined container. Before serving, let the closed container sit at room temperature 10–15 minutes so any condensation forms on the lid, not the shells. Keeping berries dry from the start is your best insurance.
Conclusion
Chocolate covered strawberry turkeys are the cheerful, no-fuss showpiece your holiday table needs. With dry berries, low-and-slow melting, and a calm decorate-in-stages flow, you’ll get glossy shells, neat faces, and sturdy little drumsticks that hold up on a buffet. These no bake Thanksgiving treats plate beautifully next to pies and cookies, and they travel well in a lined box for class parties or potlucks. Make a tray the morning of your gathering, chill briefly to set, then serve slightly cool for the best snap and juicy bite. Pin this tutorial, print the recipe, and add chocolate covered strawberry turkeys to your dessert board plan—cute, quick, and crowd-pleasing every time.